WHAT’S FOR Dessert?

Smith Island Cake

Array/5
COOK TIME
12 min
TOTAL TIME
12 minutes
SERVINGS

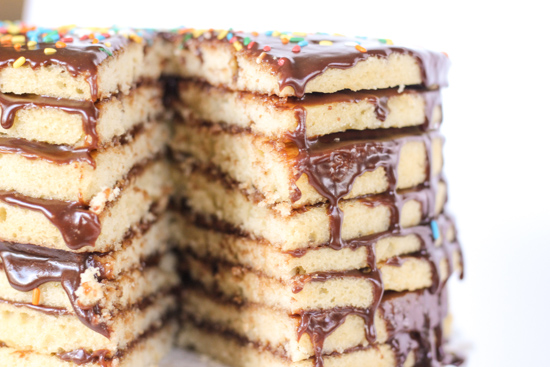
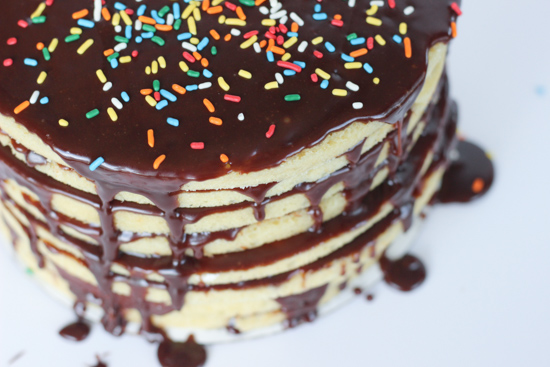
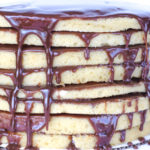
How pretty is this cake? Not in a super fancy decorated pretty way with tons of buttercream roses, but in the I-want-to-eat-this-immediately kind of pretty. I stopped scrolling when I saw this on Sally’s Baking Addiction Instagram. The drippy chocolate icing down the layers of cake is ridiculous. It was so impressive to me. So many layers of yellow cake and so much chocolate. Which happens to be my favorite combination. I needed to try to make this one. And then eat it all. Okay, maybe I’ll share.

I’ve never attempted a cake like this and it looked so intimidating, but I am happy to report that it was actually pretty easy. It took some time and a lot of waiting, but overall it was not difficult and it was SO worth it.
Print

Smith Island Cake

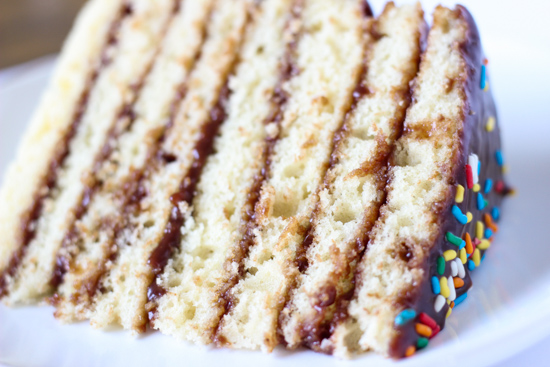
The chocolate icing gets soaked into the layers and makes a perfect, sweet bite of yellow cake and chocolate. You just have to make one batch of cake batter and then bake several small layers of the cake rather than cutting one big cake into thin layers. More time, but easier overall.

Prep time:   |  Cook time: 12 min  |  Total: 12 minutes

PRINT          RATE

Ingredients

Chocolate Icing Ingredients
6 Tablespoons butter, cut into 6 pieces
one 4 ounce bar bittersweet chocolate, chopped
1 and 2/3 cups granulated sugar
1 cup heavy cream
2 teaspoons corn syrup
1 teaspoon pure vanilla extract
pinch salt
Cake Ingredients
3 and 3/4 cups all-purpose flour
1 teaspoon baking powder
3/4 teaspoon baking soda
1 teaspoon salt
1 and 1/2 cups (3 sticks) butter, room temperature
2 cups granulated sugar
5 large eggs, room temperature
2 and 1/2 teaspoons pure vanilla extract
1 and 3/4 cups buttermilk, room temperature

Instructions

1. Make the icing first: It needs to be completely cool and thicken up before you ice the cake. In a small saucepan, combine the butter, chocolate, sugar, heavy cream and corn syrup over medium heat. Constantly stir until butter is melted.
2. Once melted, stir every now and then until the sugar dissolves and the mixture comes to a boil. Boil for 1 minute. Remove from the heat and stir in the vanilla and add a pinch of salt.
3. Leave uncovered and allow to thicken and cool while you make and bake the cakes.
Cake:
1. Preheat oven to 350 degrees. Grease and flour 9-inch cake pans, set aside. I did 3 at a time, but you do you and whatever you have for cake pans.
2. Whisk the flour, baking powder, baking soda, and salt together in a large bowl. Set aside.
3. In a mixer, beat the butter and sugar together on high speed until smooth and creamy, about 3 minutes. Scrape the sides of the bowl as needed.
4. On medium speed, add 1 egg at a time, beating until just combined. Add the vanilla extract and mix again. With the mixer on low speed, add the dry ingredients in three sections alternating with the buttermilk, beginning and ending with the dry ingredients, and mixing each addition just until incorporated. Be very careful not to overmix. Batter will be smooth but slightly thick.
5. Each of the cakes should have a little less than 1 cup of batter. Pour batter into cake pans and bake for 10-12 minutes (mine took 10 minutes) or until a toothpick inserted comes out clean. Allow to cool for a few minutes then invert the pans and place cakes onto the counter to continue to cool while you prepare the next round of cakes.
6. Repeat again, grease and flour cake pans. Pour a little less than 1 cup into the pans and bake for 10-12 minutes. Allow all the cakes to cool completely before assembling.
7. Assemble cake: Carefully place one layer on a cake round or platter. Pour about 1/4 cup of icing on the layer and spread out. Make sure some spills over the edges, that’s the prettiest part. Repeat and add another layer and top with icing and spread until all layers are assembled. Top with sprinkles if desired.
8. Set cake aside for at least 30 minutes before slicing and serving. This allows the icing to set and also soak into the cake layers. Send me a pic if you make this cake, I love it so much!

Notes

DID YOU MAKE THIS RECIPE?

Tag @LOLOHomeKitchen on Instagram and hashtag it #lolohk

CHECK IT OUT

Leave A Comment

Recipe rating 5 Stars 4 Stars 3 Stars 2 Stars 1 Star

  • Sign me up. Sign me up. Sign me up. Sign me up. Sign me up. Sign me up.
  • Sign me up. Sign me up. Sign me up. Sign me up. Sign me up. Sign me up.
  • Sign me up. Sign me up. Sign me up. Sign me up. Sign me up. Sign me up.

Share this: