Search
Close this search box.

WHAT’S FOR DESSERT?

Brownie Ice Cream Cake

/5
straight on view of a layered brownie ice cream cake
COOK TIME
TOTAL TIME
2 hours+ freeze time
SERVINGS
12-16 pieces
overhead view of a layered brownie ice cream cake
straight on view of a layered brownie ice cream cake

Brownie Ice Cream Cake is one of those perfect desserts that mixes amazing flavors and textures. I haven’t met a person yet who doesn’t enjoy an ice cream cake. I also love this cake because it’s easy to make. Mostly just assembling layers. You can make this one as homemade or straight from the store as you want. Those are my favorite kind of recipes. 

What are the Layers in an Ice Cream Cake?

You can use a lot of different things for an Ice Cream Cake and everyone usually has something they vision. The important part is choosing a base that can hold up the ice cream. So a brownie like in this Brownie Ice Cream Cake is a perfect choice. You can also use a cookie, crust or a pound cake. The rest of the layers are where you can get creative. 

I decided to use a hot fudge and Oreo crumble mix for the second layer. I love the mix of smooth fudge and crunchy cookies. This was always my favorite part of any Dairy Queen Ice Cream Cake. 

Next is the Ice Cream. Any flavor you like. I used a classic Hiland Dairy Vanilla for this one, it’s my favorite vanilla. But any flavor would be great in this cake. Next time I may use Hiland Dairy Moose Tracks, it’s one of my favorites! Leave the ice cream out of the counter for abut 5 minutes before adding this layer, it helps in spreading it out if it’s a little soft. 

A little (or a lot) of caramel sauce and then topped off with a homemade whipped cream. You can definitely use Cool Whip as well. Add some cookie crumbles to make it pretty and get to eating!

Check out the easy recipe and video below and let me know what you think!

Also, be sure to check out these other ice cream related yummy recipes!

Buster Bar Ice Cream Cake

Ice Cream Sundae Bar

Lemon Icebox Cake

Print
overhead view of a layered brownie ice cream cake

Brownie Ice Cream Cake

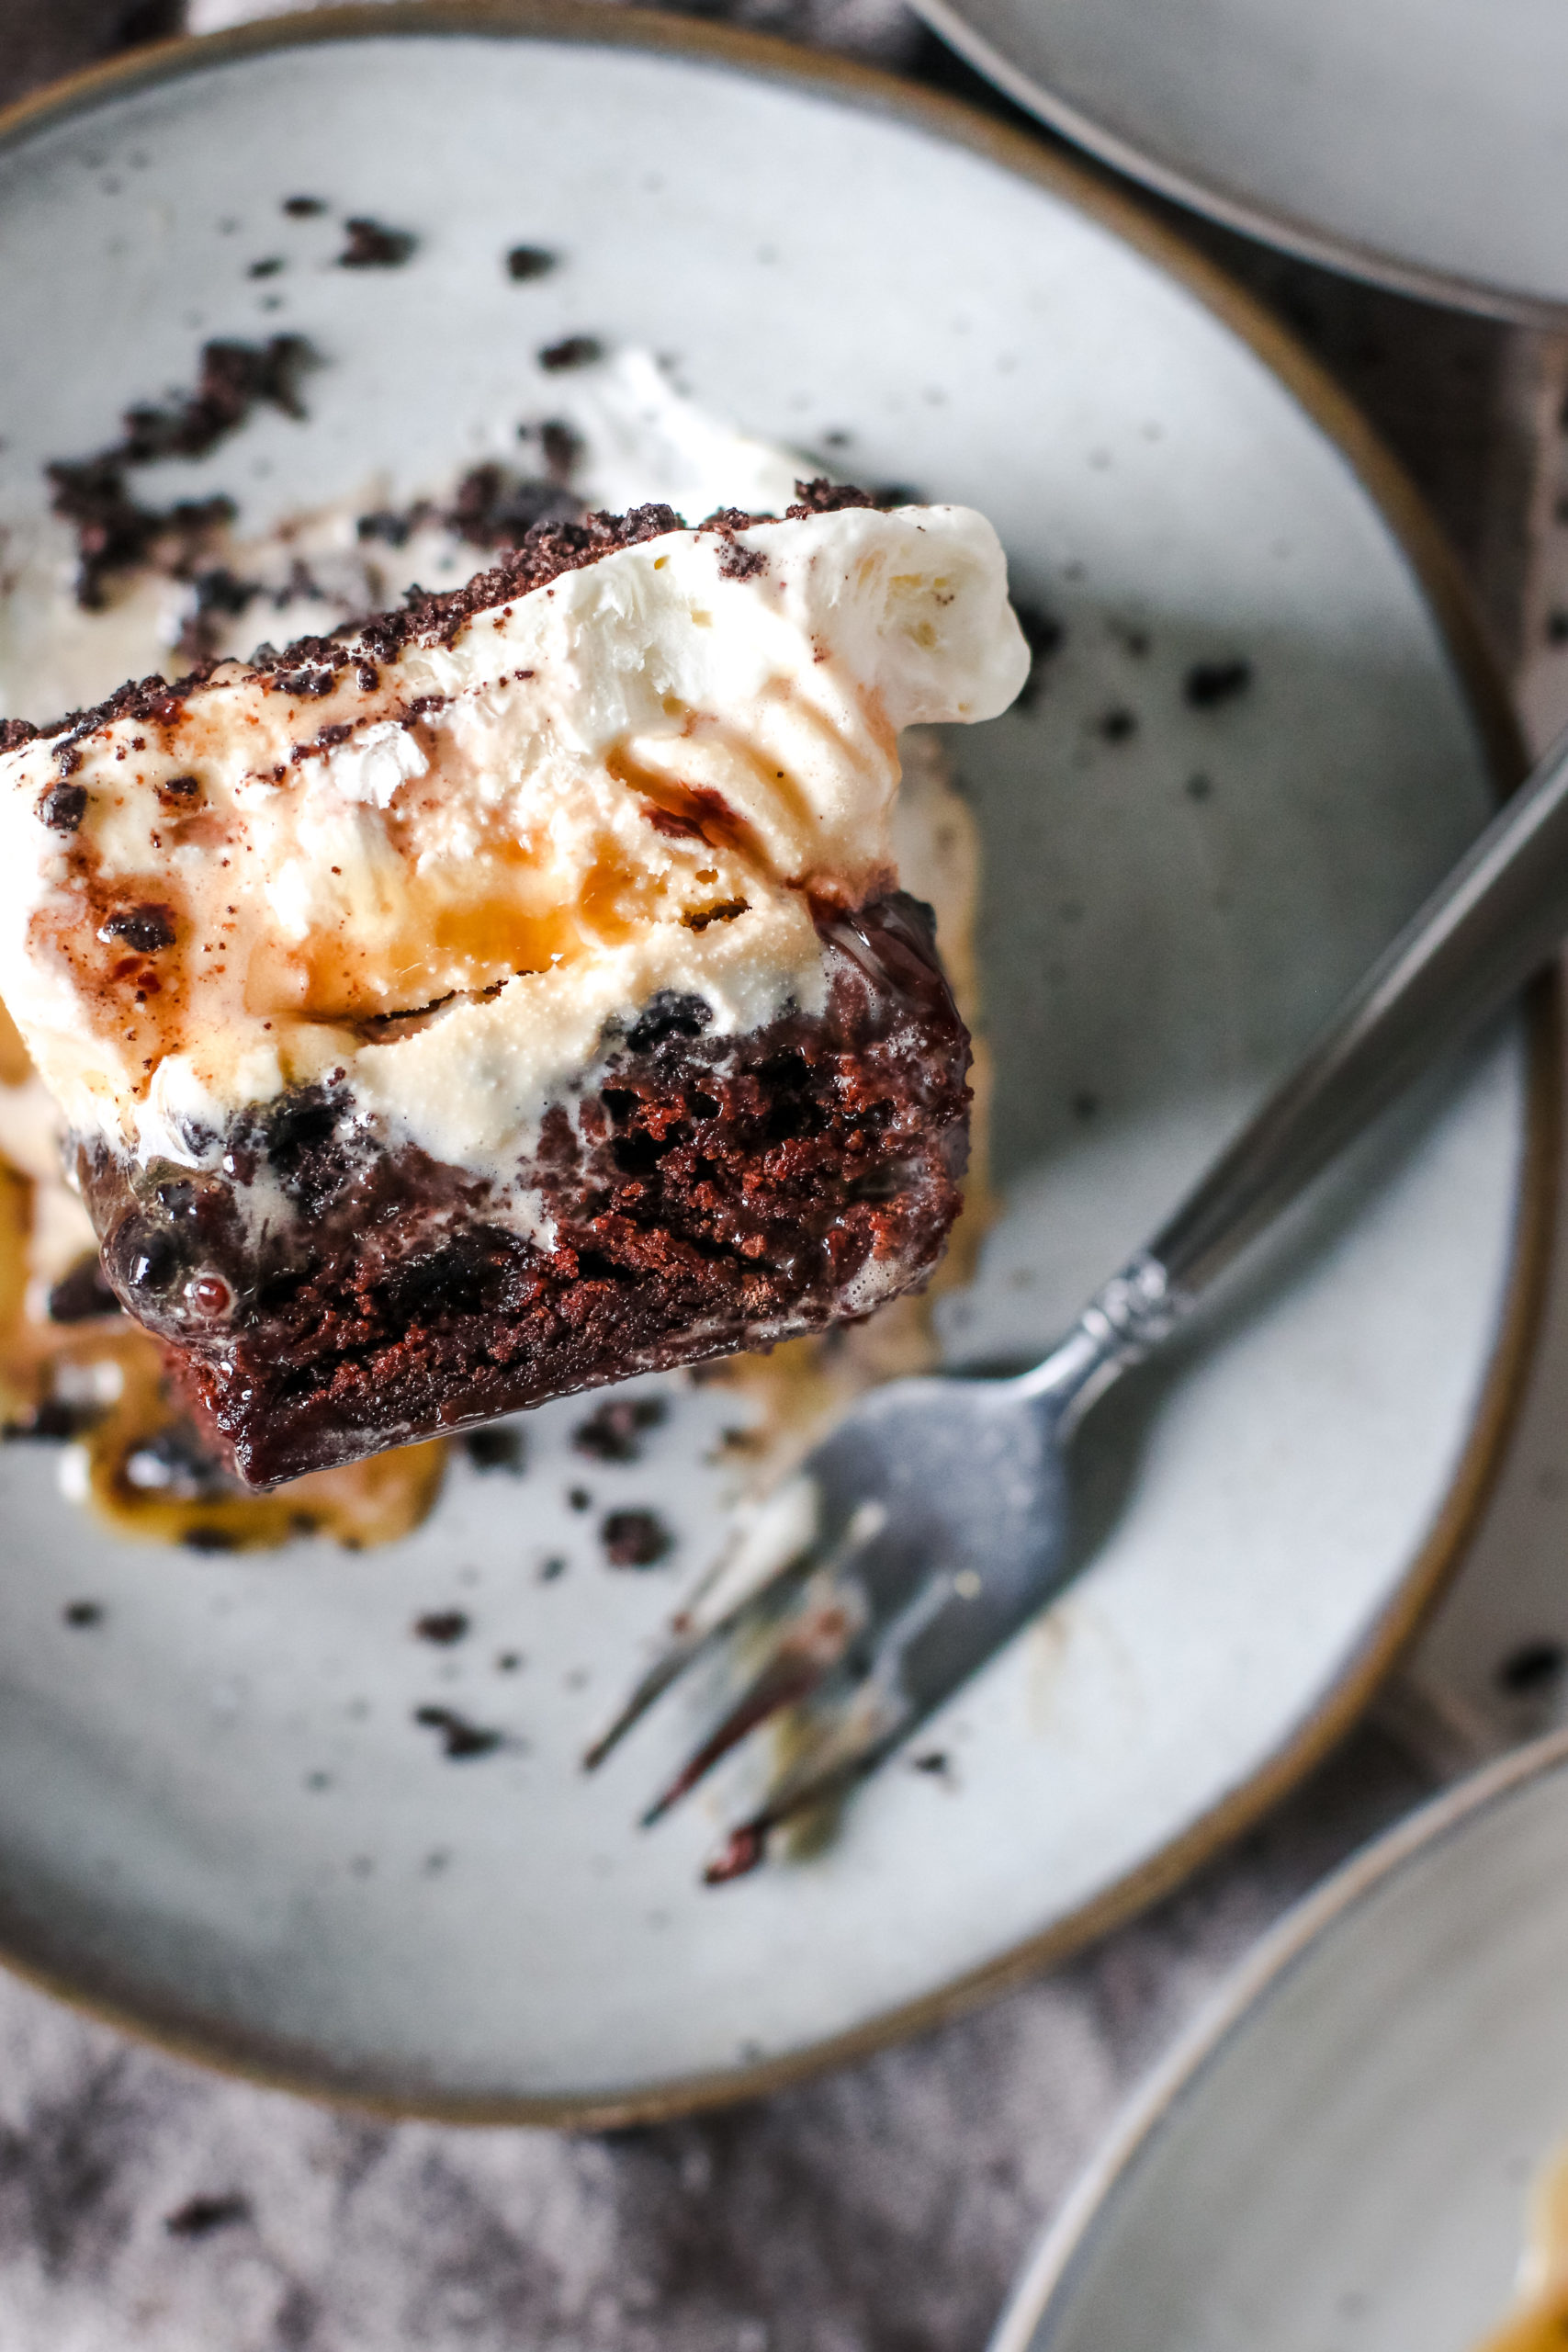
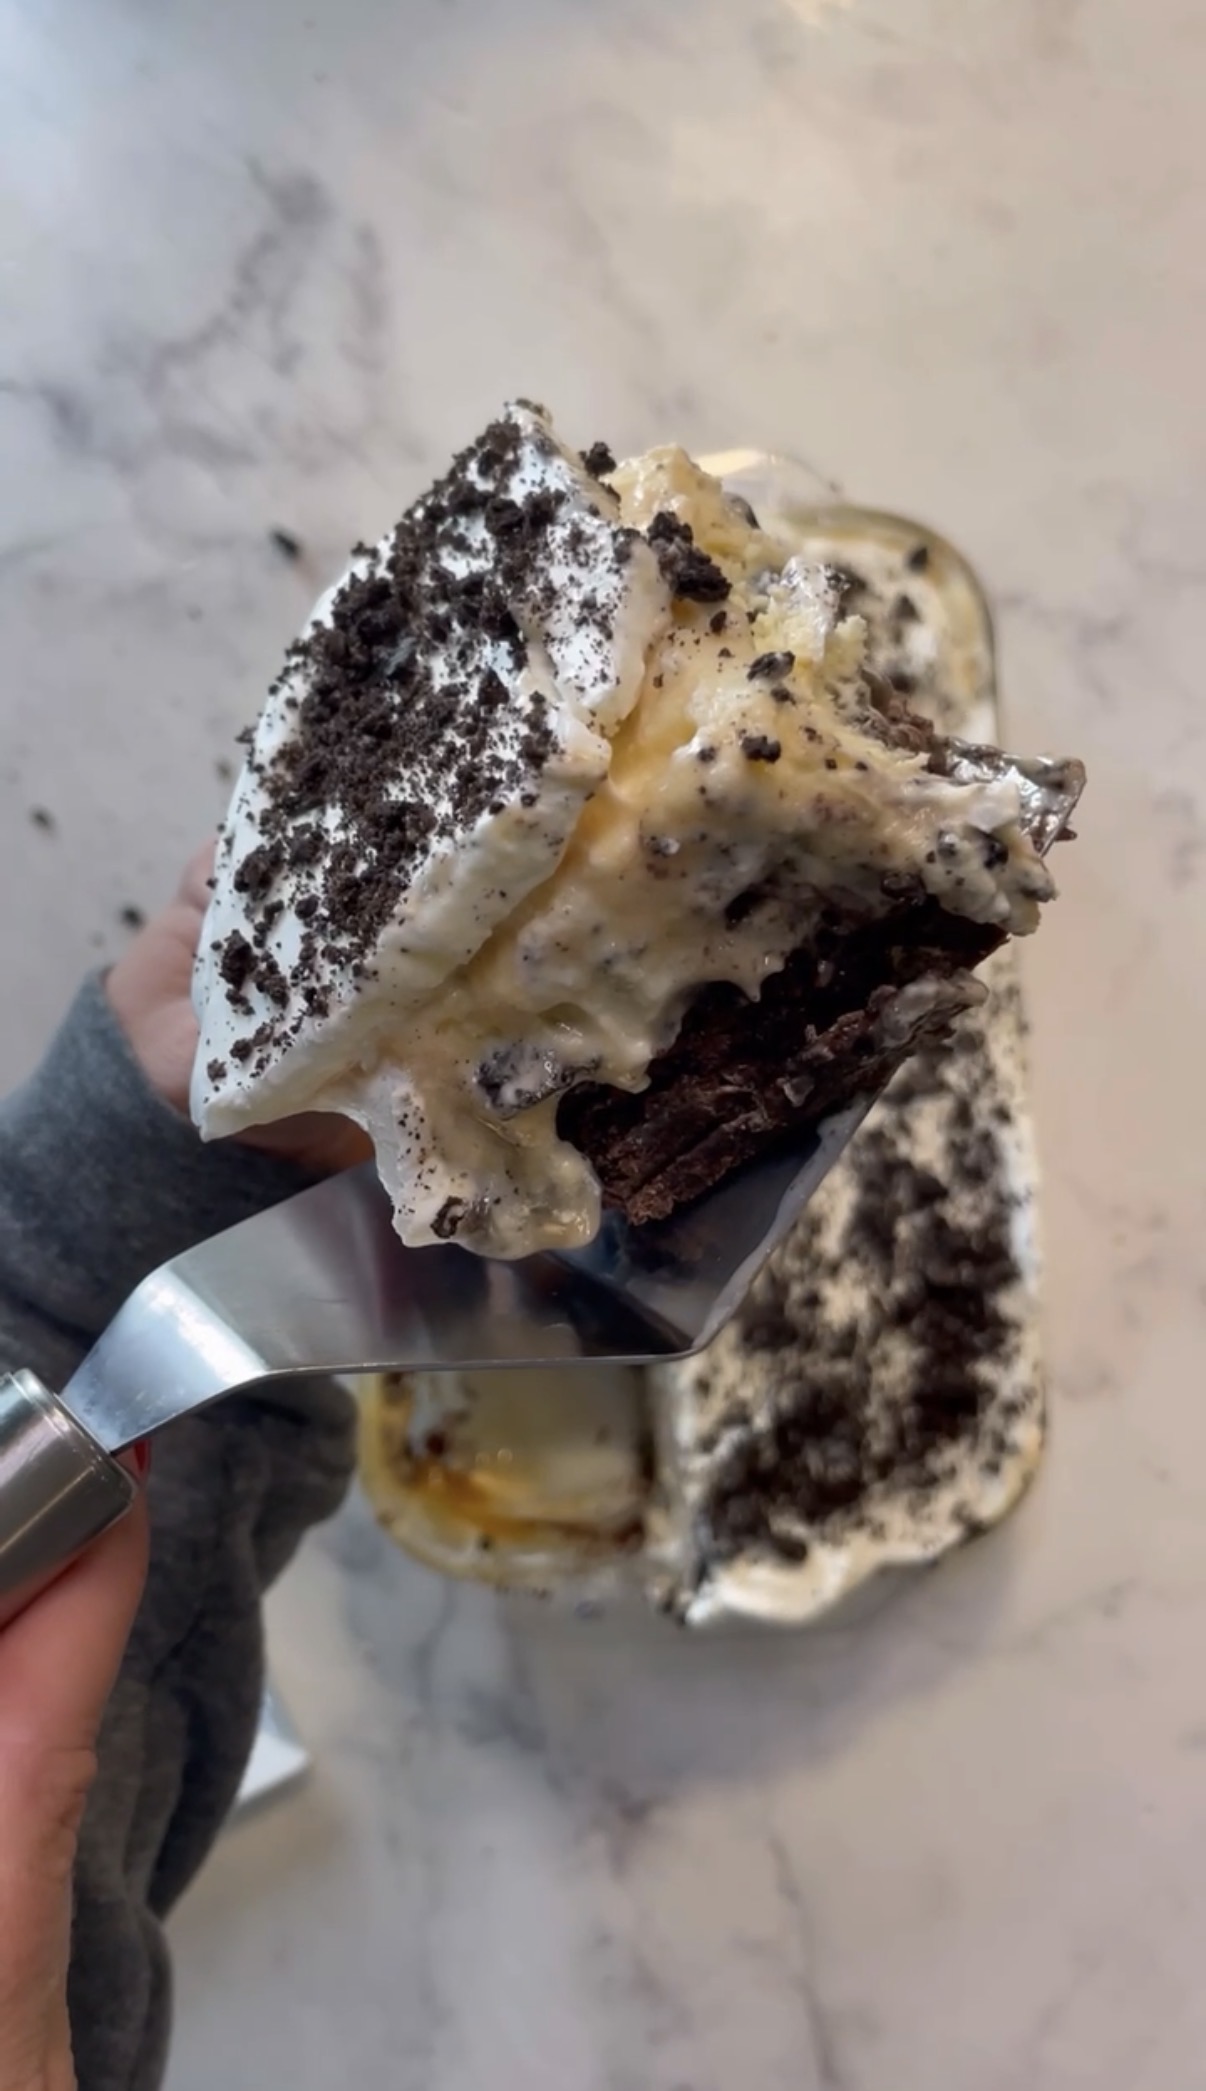
Layers of chewy brownie, fudge and Oreos, soft ice cream and a creamy layer of caramel and whipped cream. The perfect ice cream treat!

overhead view of a layered brownie ice cream cake

Prep time: 2 hours+ freeze time  |  Cook time:   |  Total: 2 hours+ freeze time

PRINT          RATE

Ingredients

1 box brownie mix, prepare per box instructions

15 Oreos broken up into small pieces

1 jar Hot Fudge Topping

Hilnd Dairy Ice Cream, any flavor (2 Quarts)

1 jar Caramel Sauce

Whipped Topping: (you can also use Cool Whip)

1 cup Hiland Dairy Heavy Cream

2 Tablespoons powdered sugar

1/2 teaspoon pure vanilla extract

Instructions

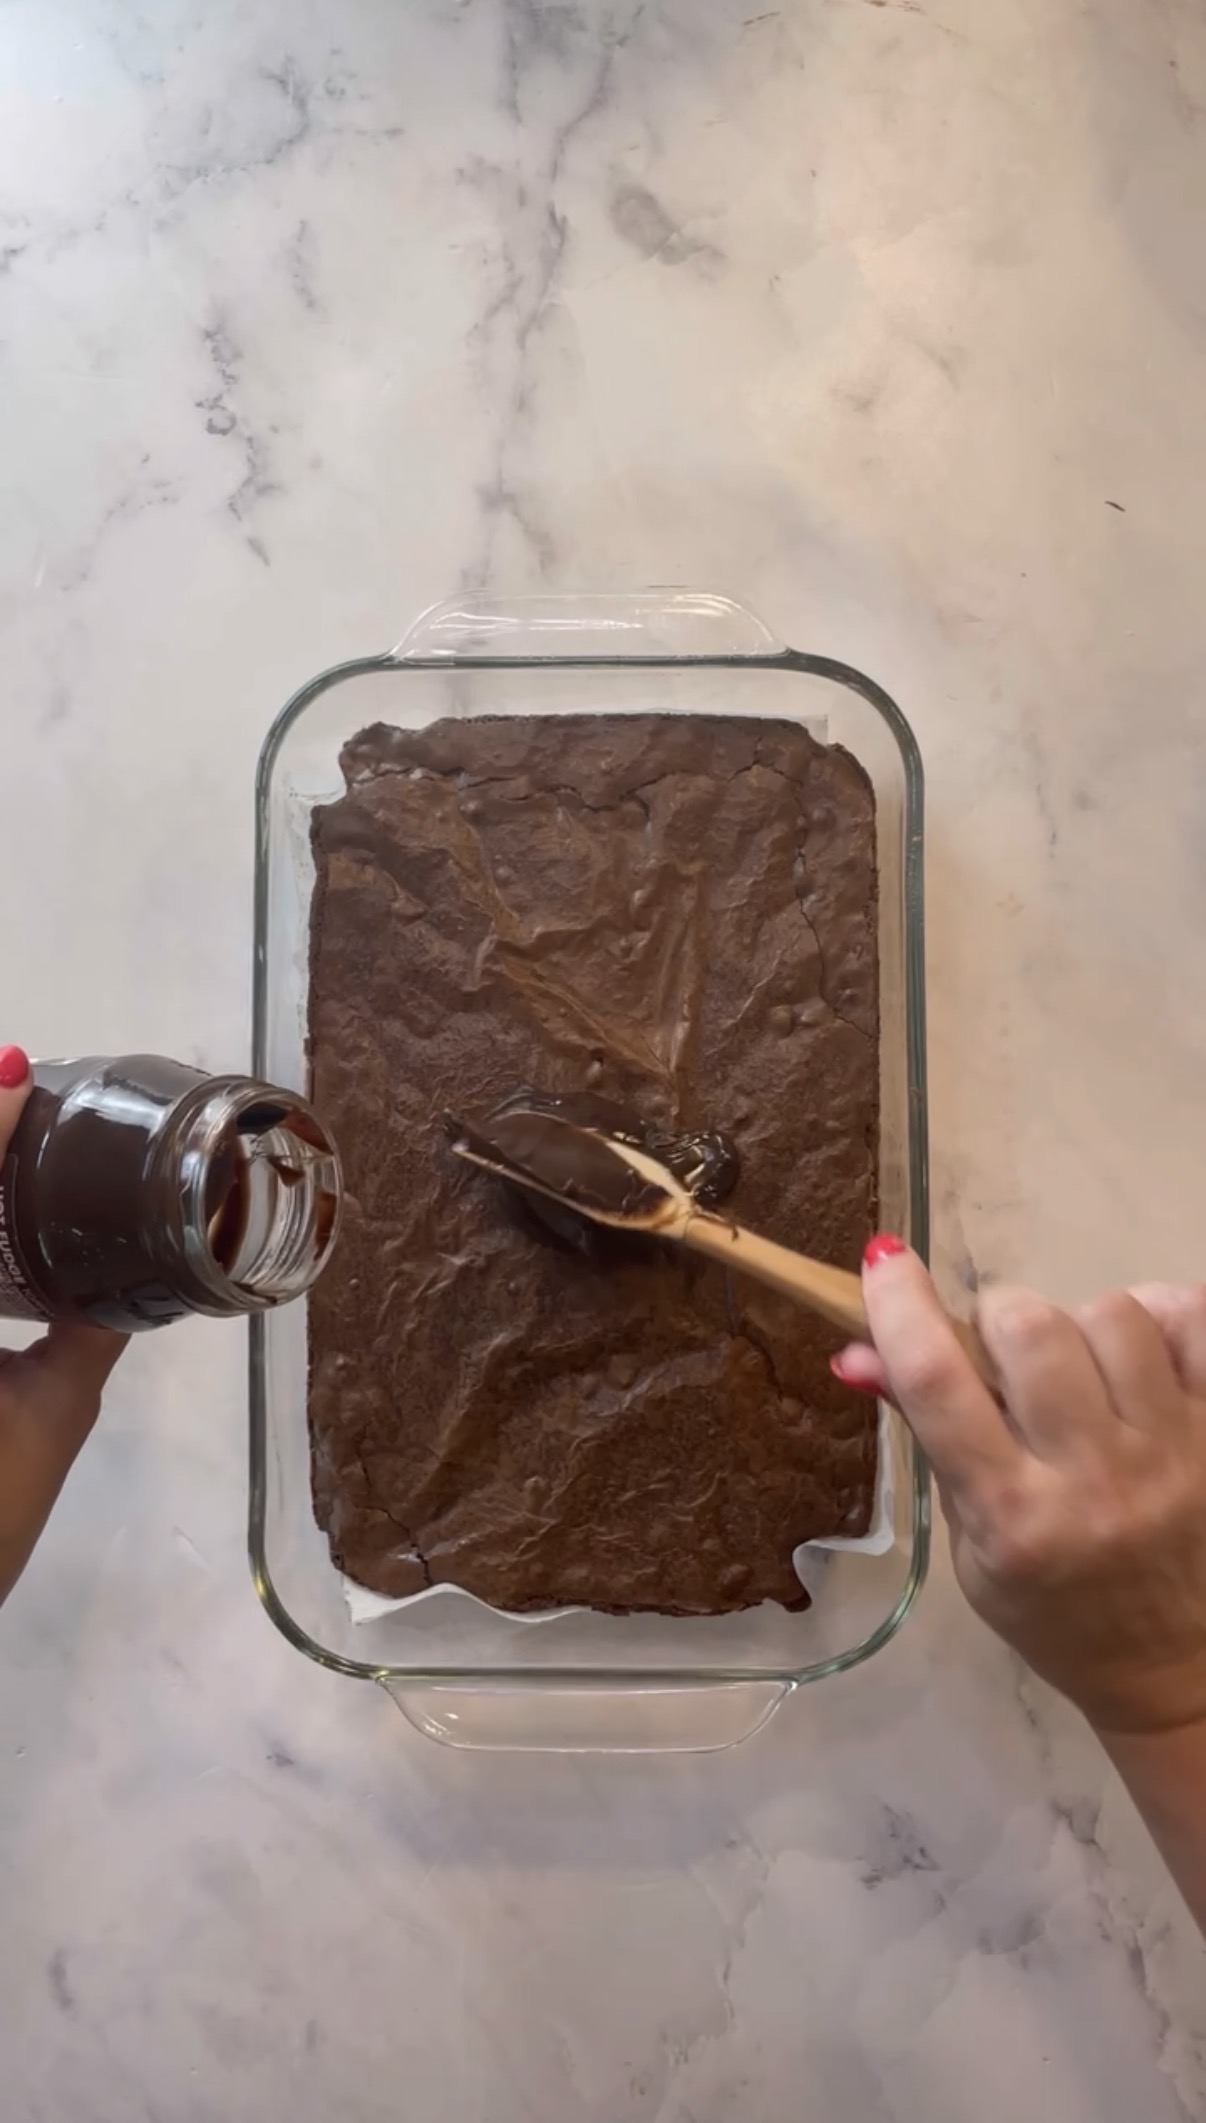
1. Prepare the box brownie mix according to the box instructions. Once baked, set aside to cool completely. Place in freezer while preparing the second layer.

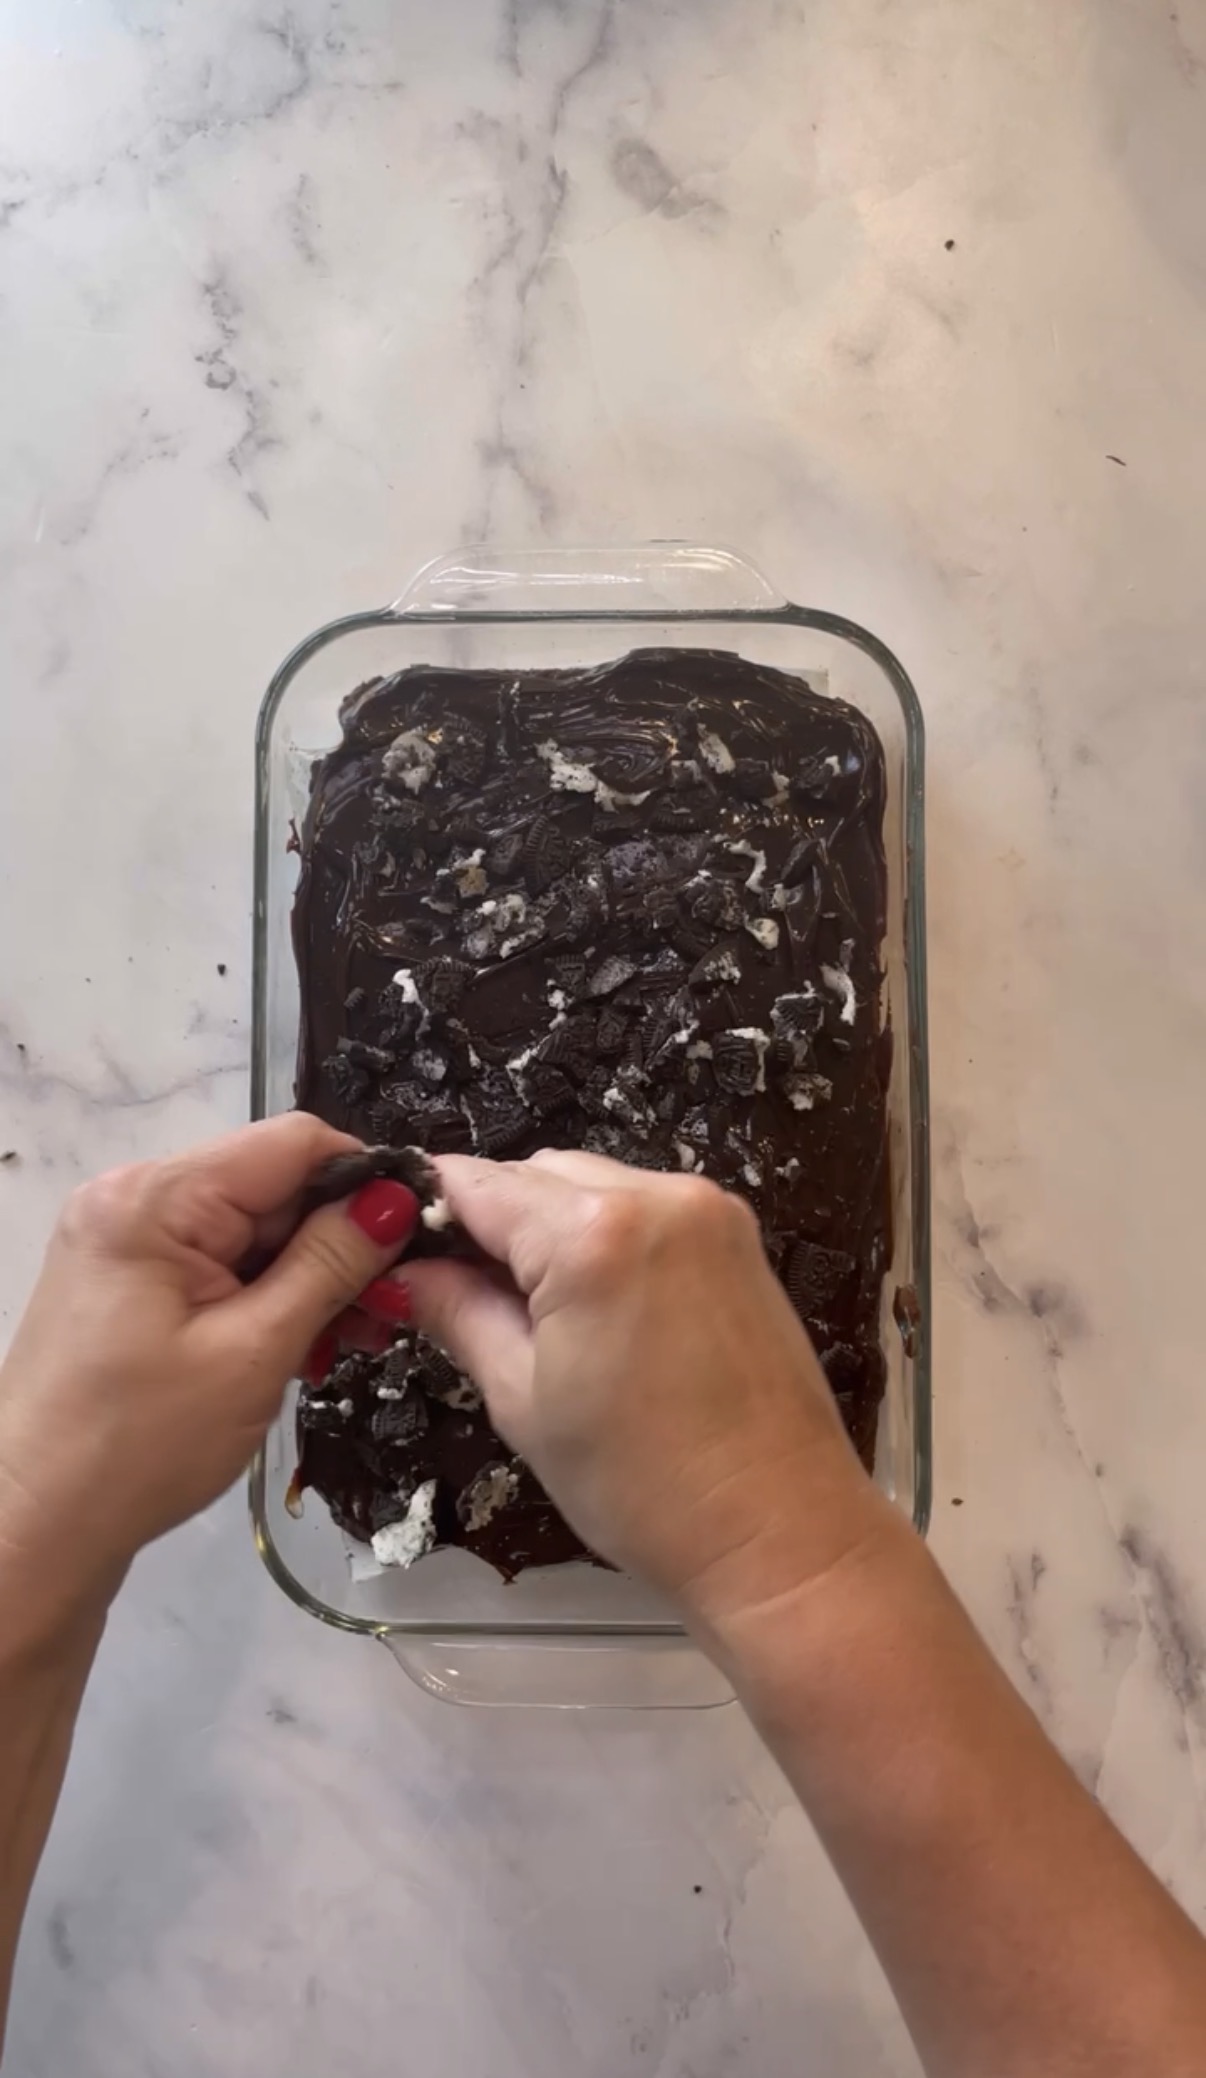
2. Heat the jar of hot fudge up slightly in the microwave to make it easier to spread. Take the brownies out of the freezer and spread the hot fudge over the top. Next, place the broken up Oreos on top of the hot fudge in an even layer and press the Oreos into the fudge using a spatula. Place bake in the freezer for 15 minutes.

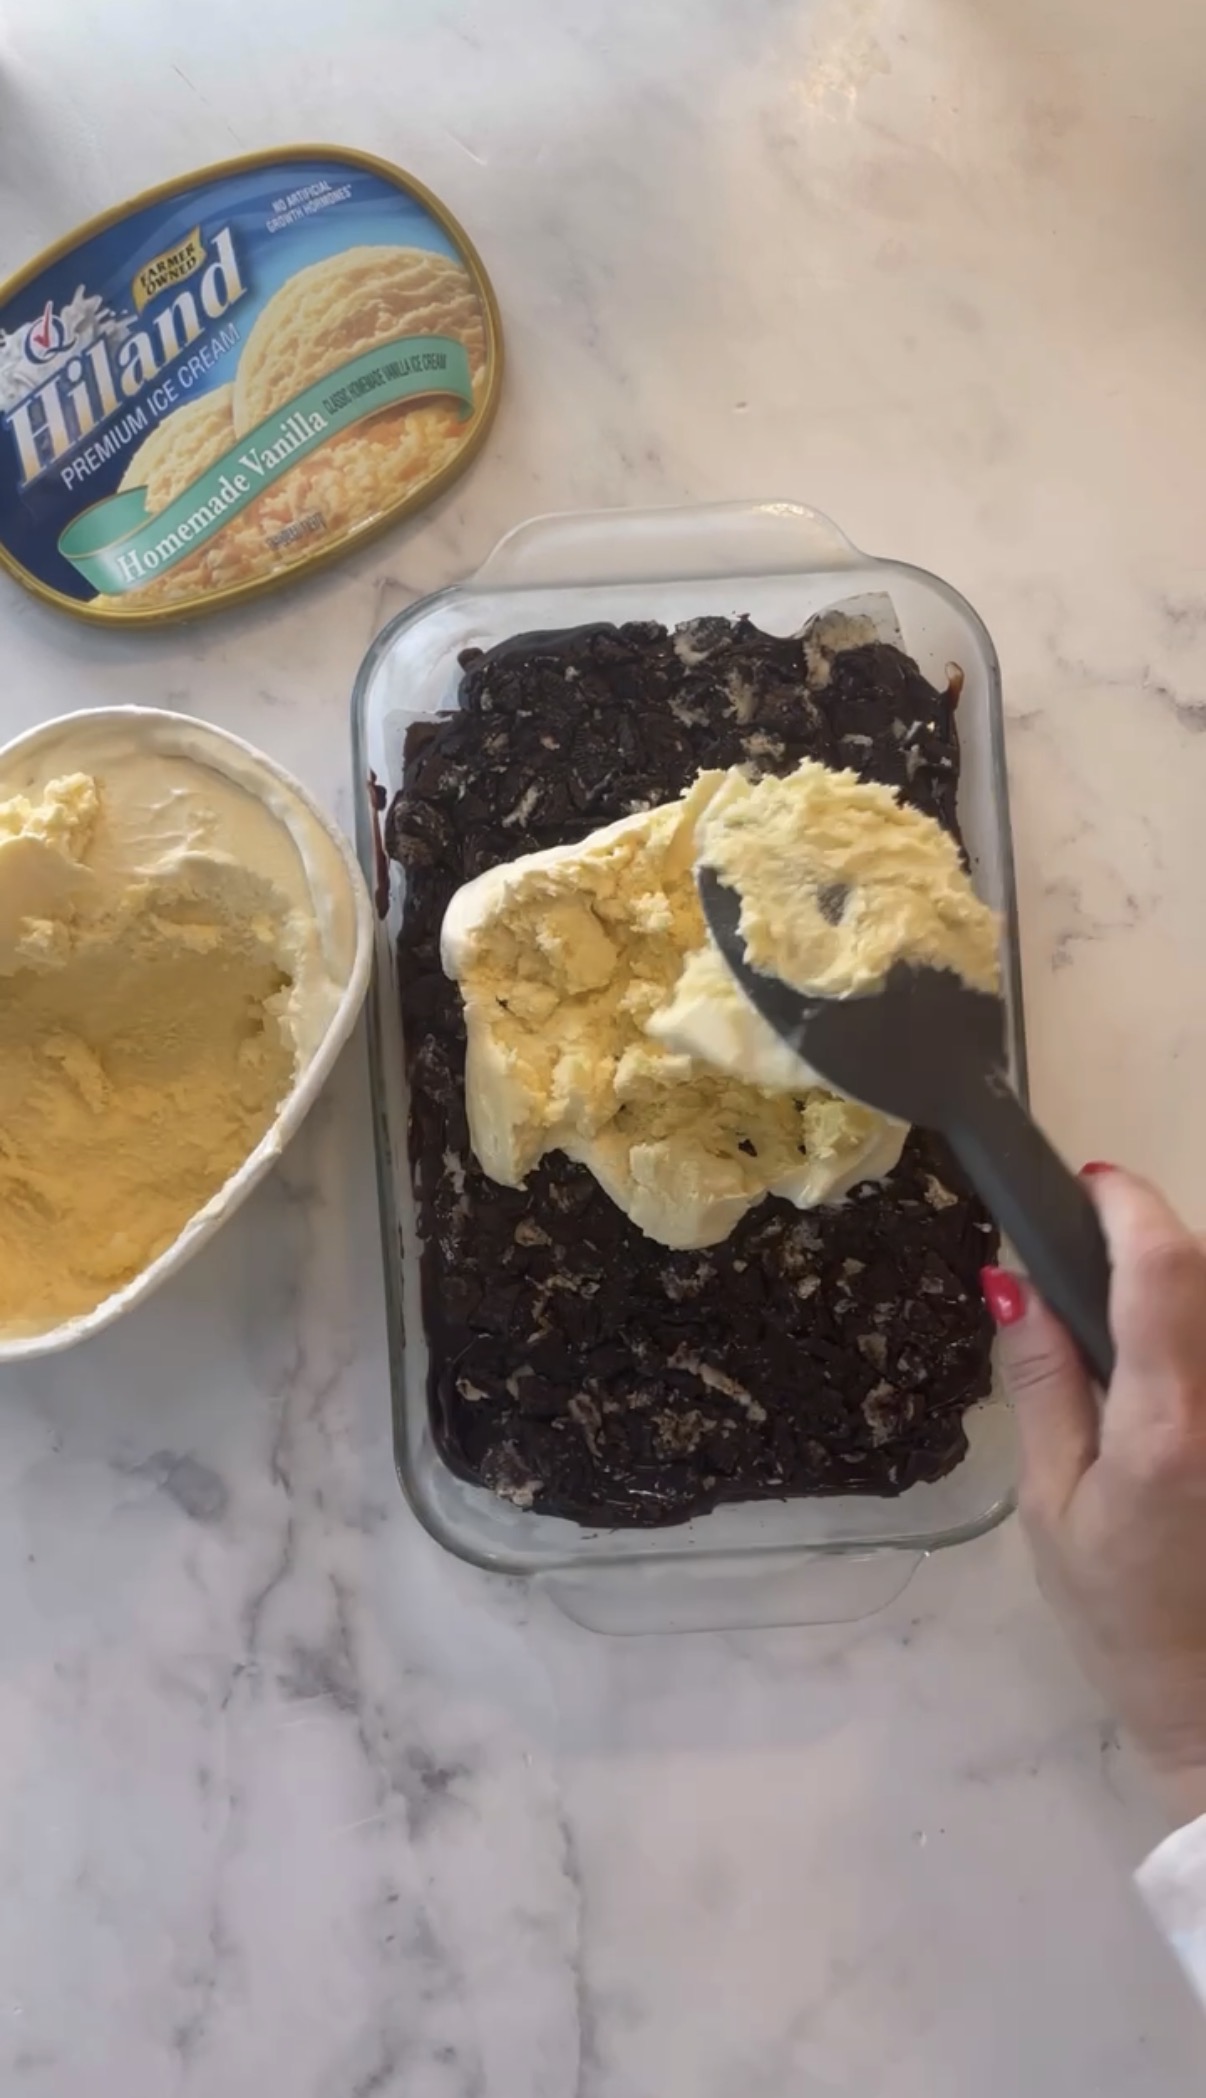
2. While the brownies are in the freezer, set the ice cream out on the counter so it softens a bit. Next scoop the ice cream onto the hot fudge/Oreo layer and use a spatula to spread the ice cream out in an even layer. Place back in the freezer for 15 minutes.

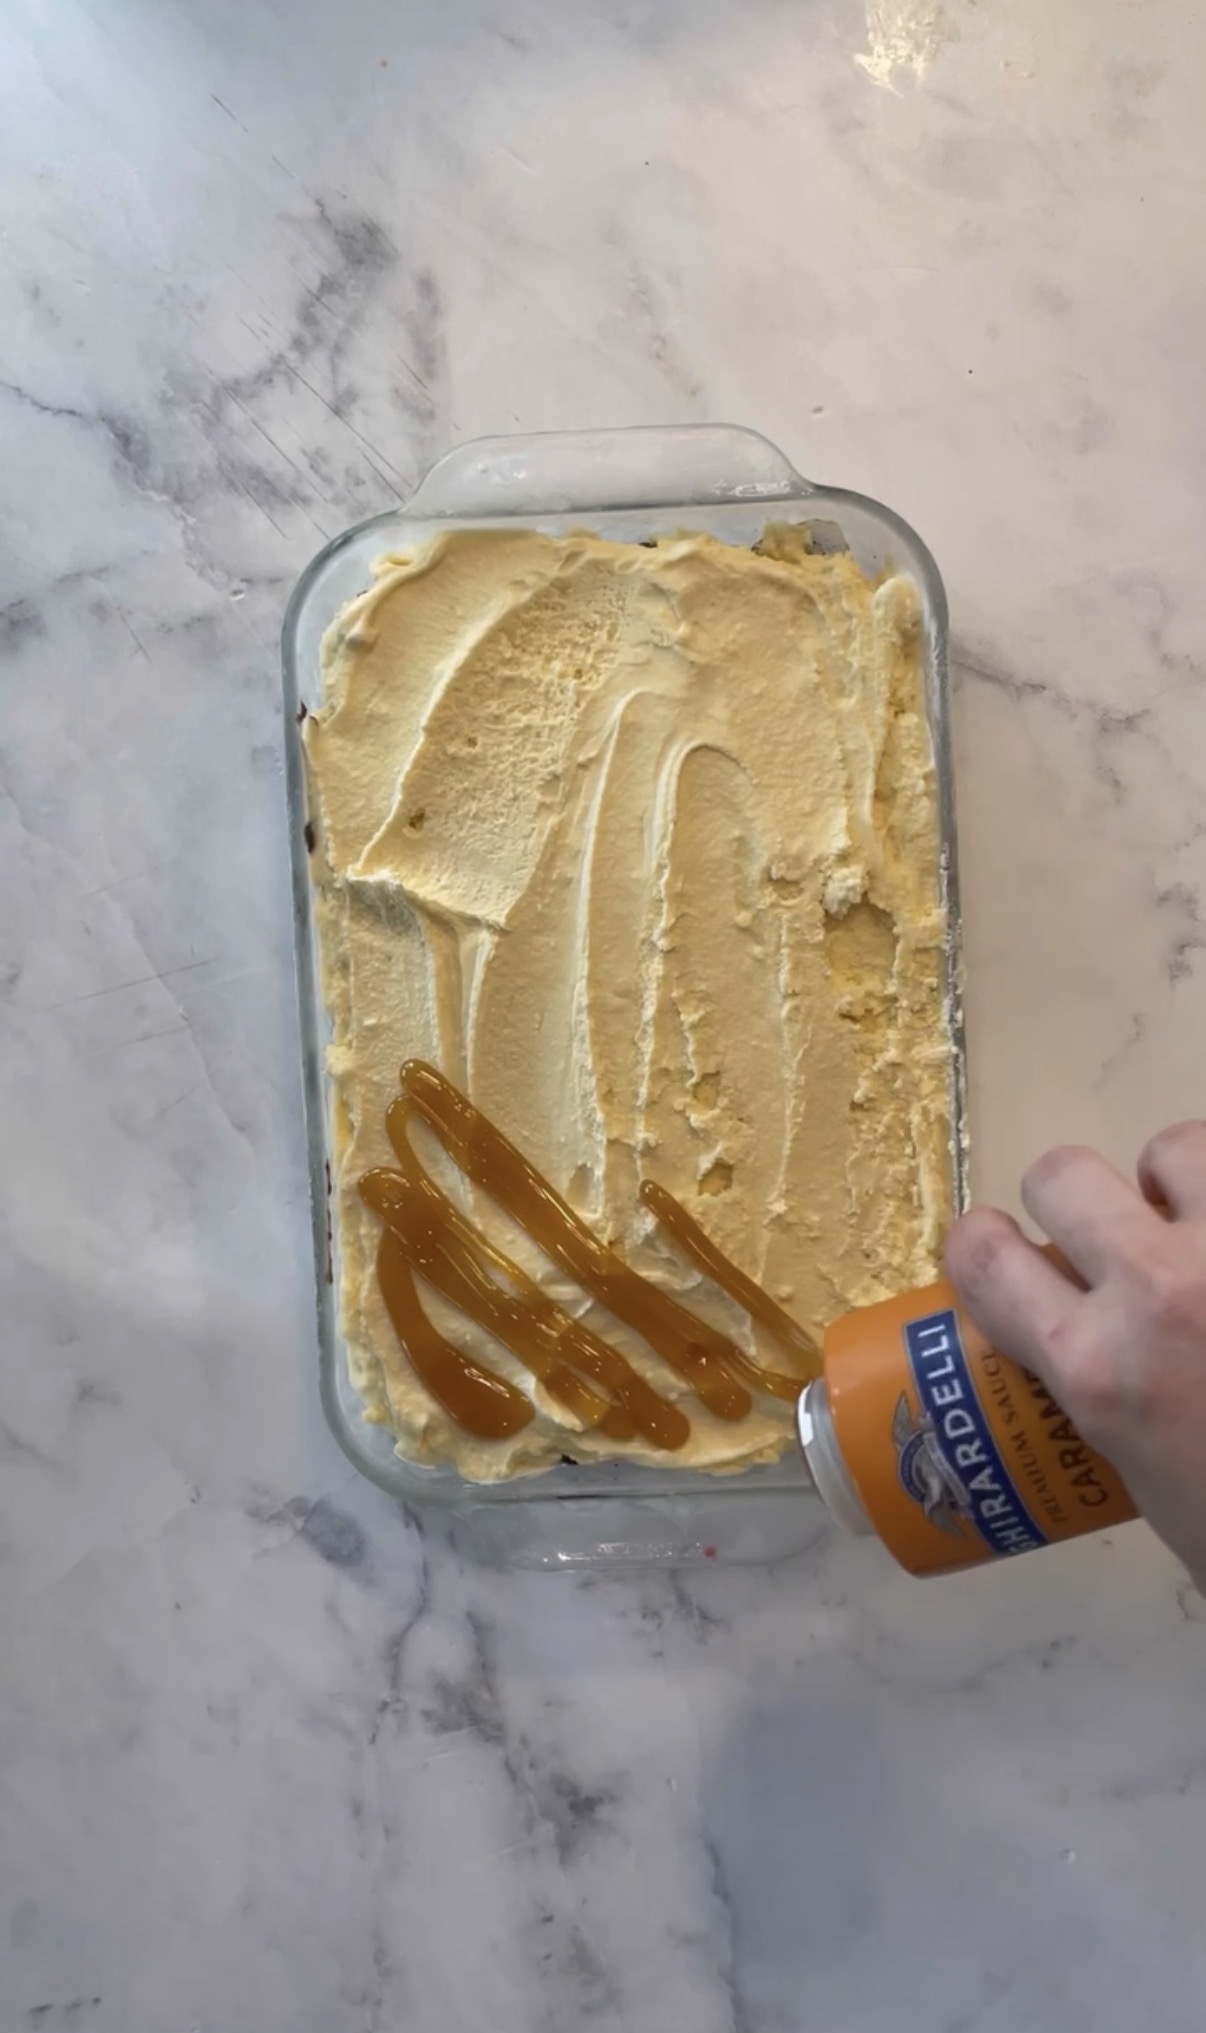
3. Take the cake out of the freezer and pour the caramel over the top of the ice cream. Spread this out into an even layer and place the cake back in the freezer for another 15 minutes.

4. While the cake is in the freezer, make the whipped topping. In a medium bowl, add the Hiland Dairy Heavy Cream to the bowl with the powdered sugar and vanilla. Using a hand mixer, mix on med high speed for a few minutes until stiff peaks form.

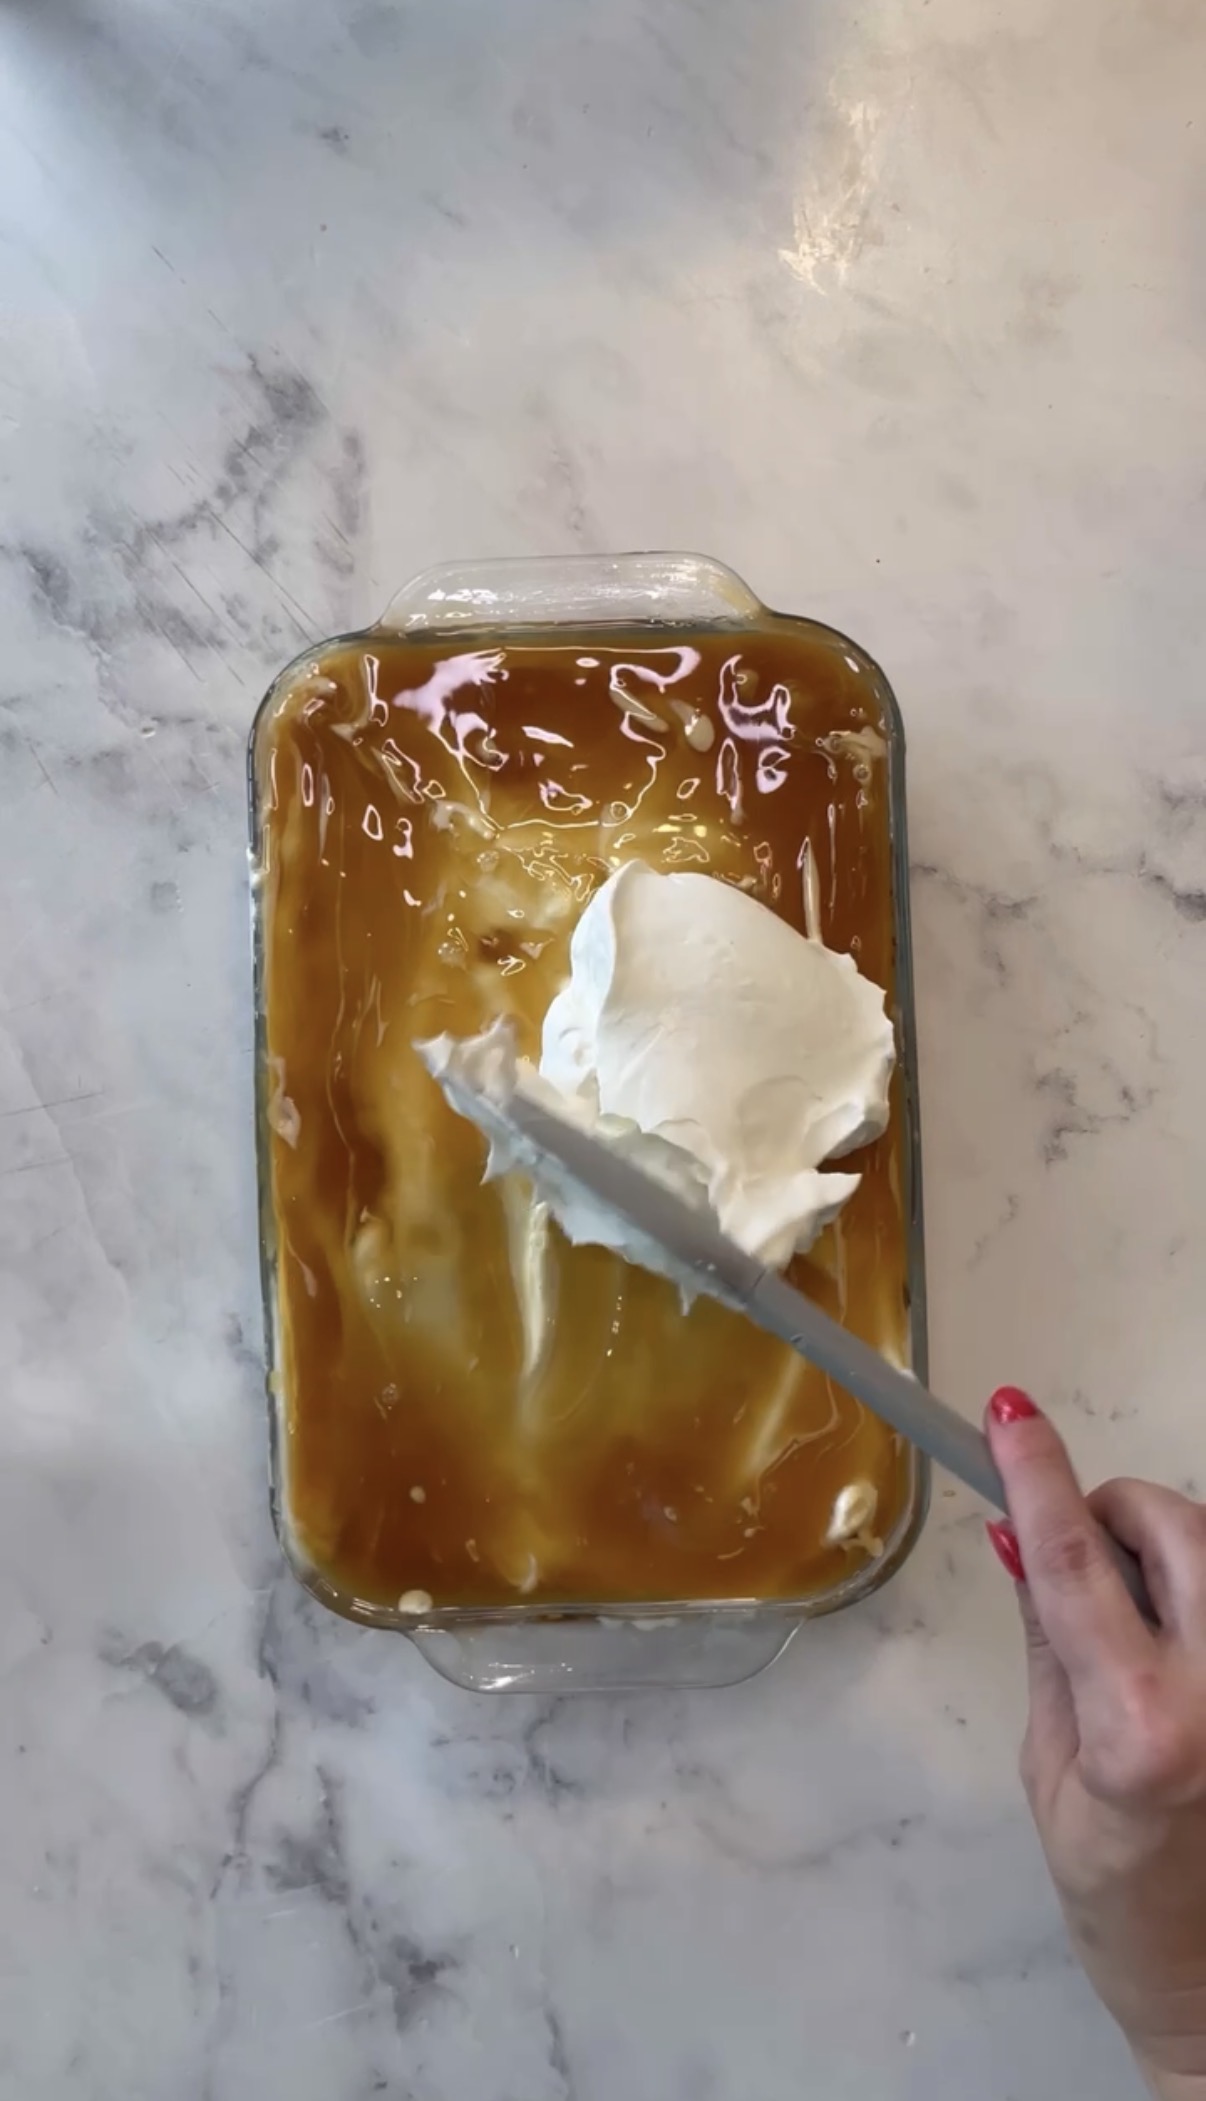
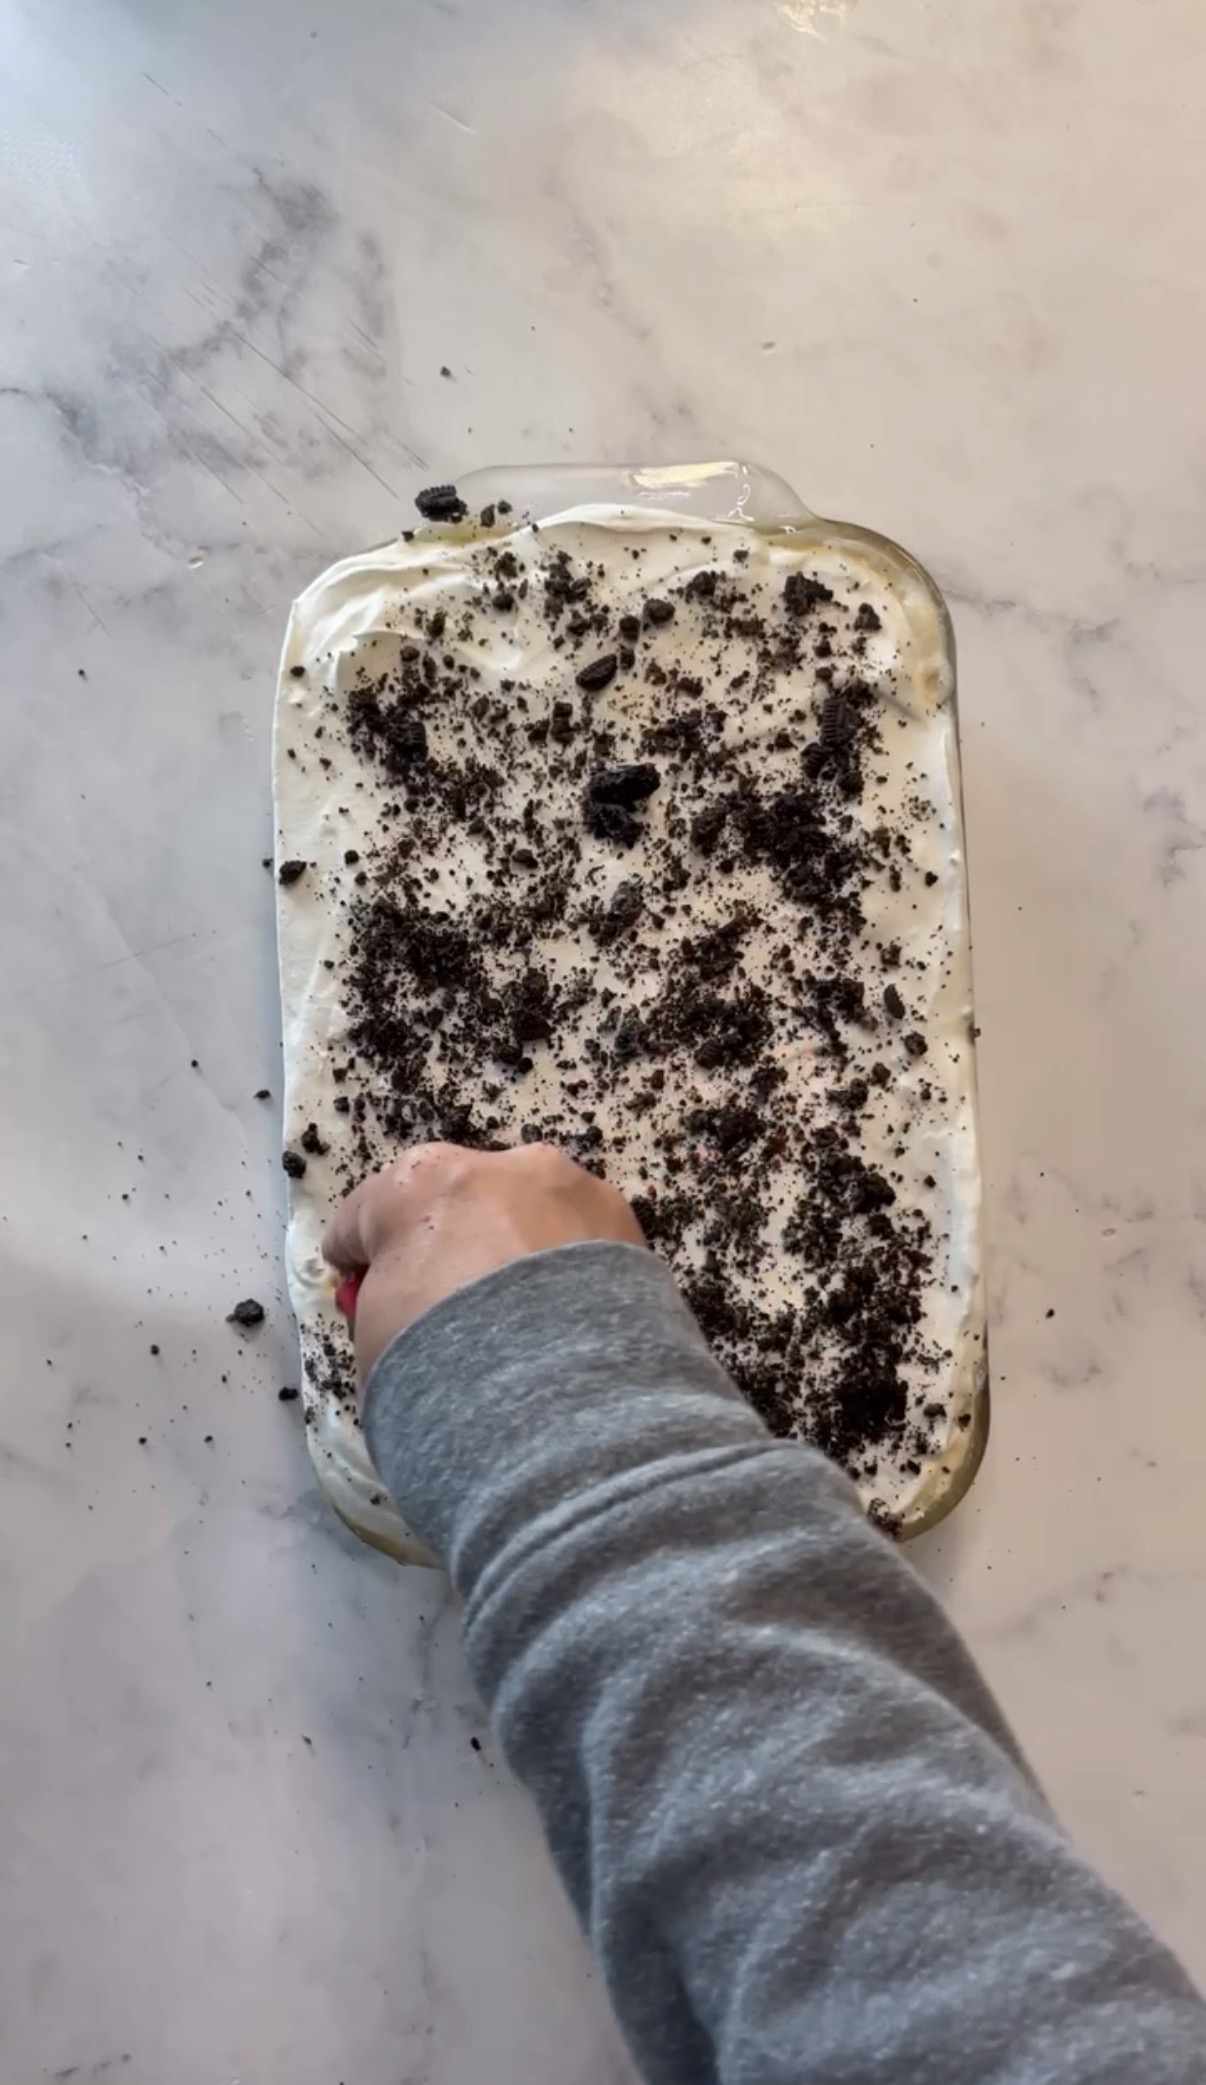
5. Take the cake out of the freezer and spread the homemade whip cream (or Cool Whip) on the top and spread out evenly. Add Oreo crumbles to the top and then place back in the freezer until read to serve! Enjoy!

Notes

DID YOU MAKE THIS RECIPE?

Tag @LOLOHomeKitchen on Instagram and hashtag it #lolohk

CHECK IT OUT

Leave A Comment

Recipe rating 5 Stars 4 Stars 3 Stars 2 Stars 1 Star

    • Sign me up. Sign me up. Sign me up. Sign me up. Sign me up. Sign me up.
    • Sign me up. Sign me up. Sign me up. Sign me up. Sign me up. Sign me up.
    • Sign me up. Sign me up. Sign me up. Sign me up. Sign me up. Sign me up.

    Share this: