

WHAT’S FOR A HEALTHY TREAT?

Chocolate Protein Cheesecake Cups

Rated 0 out of 5
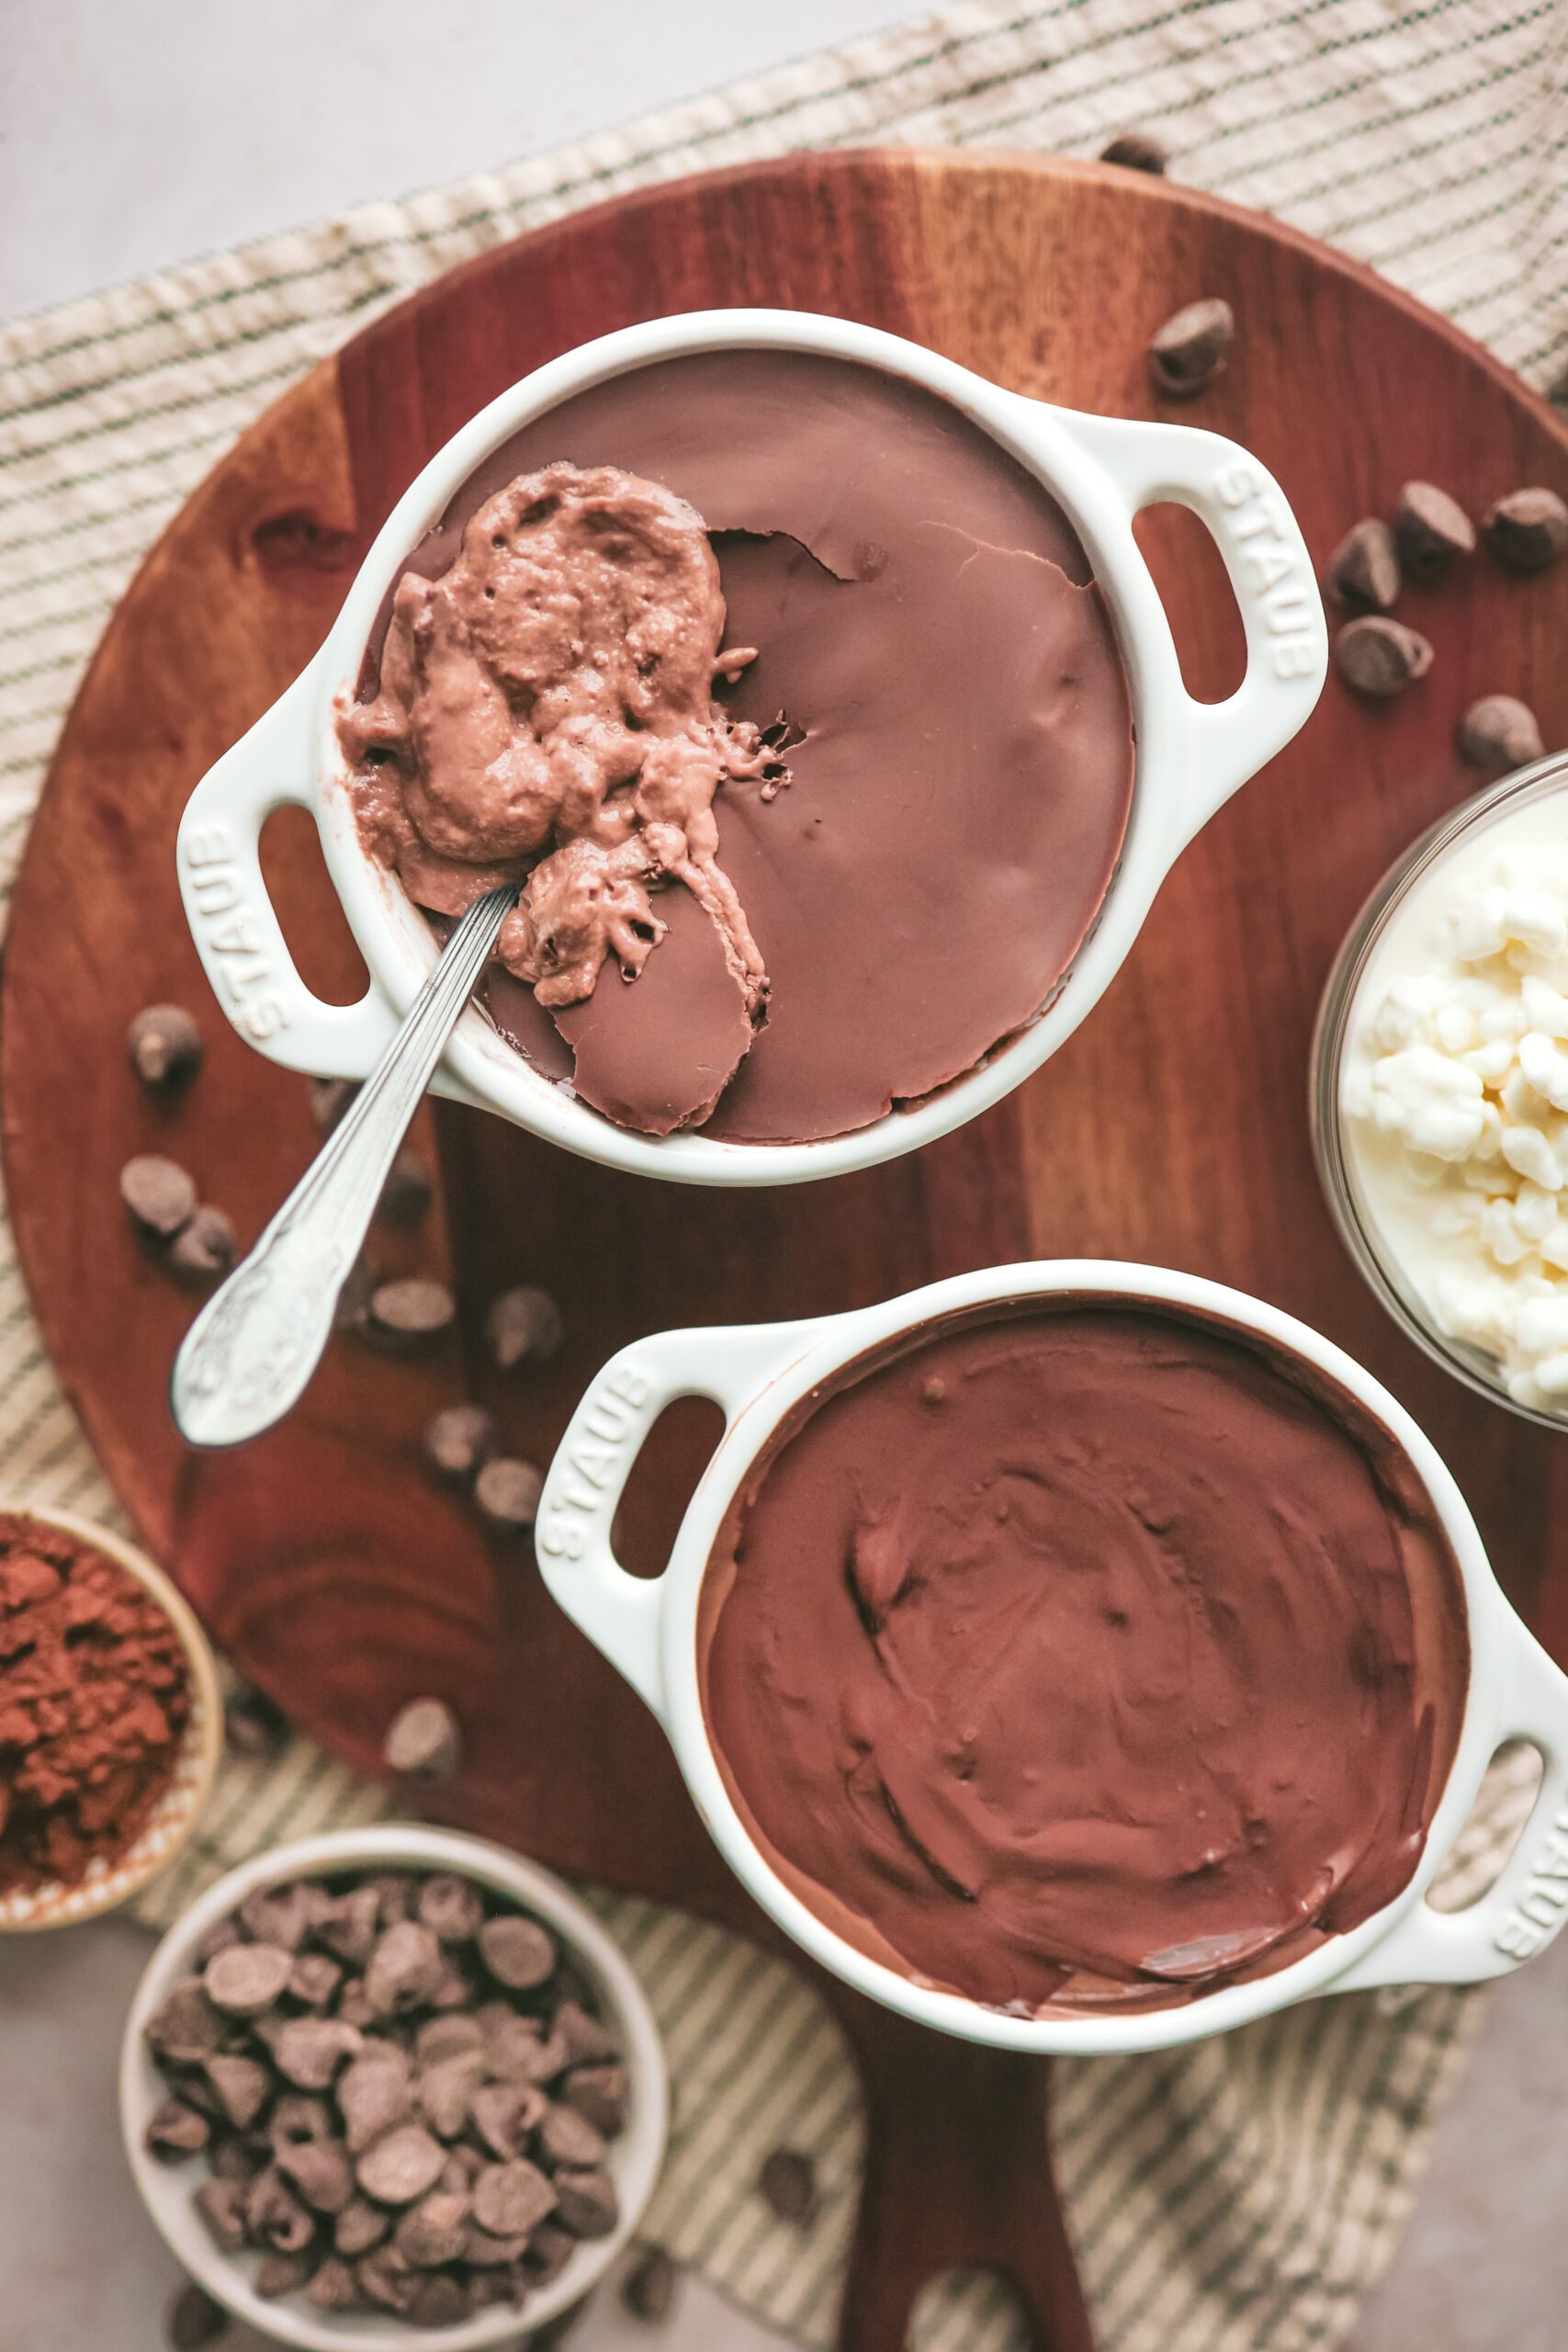
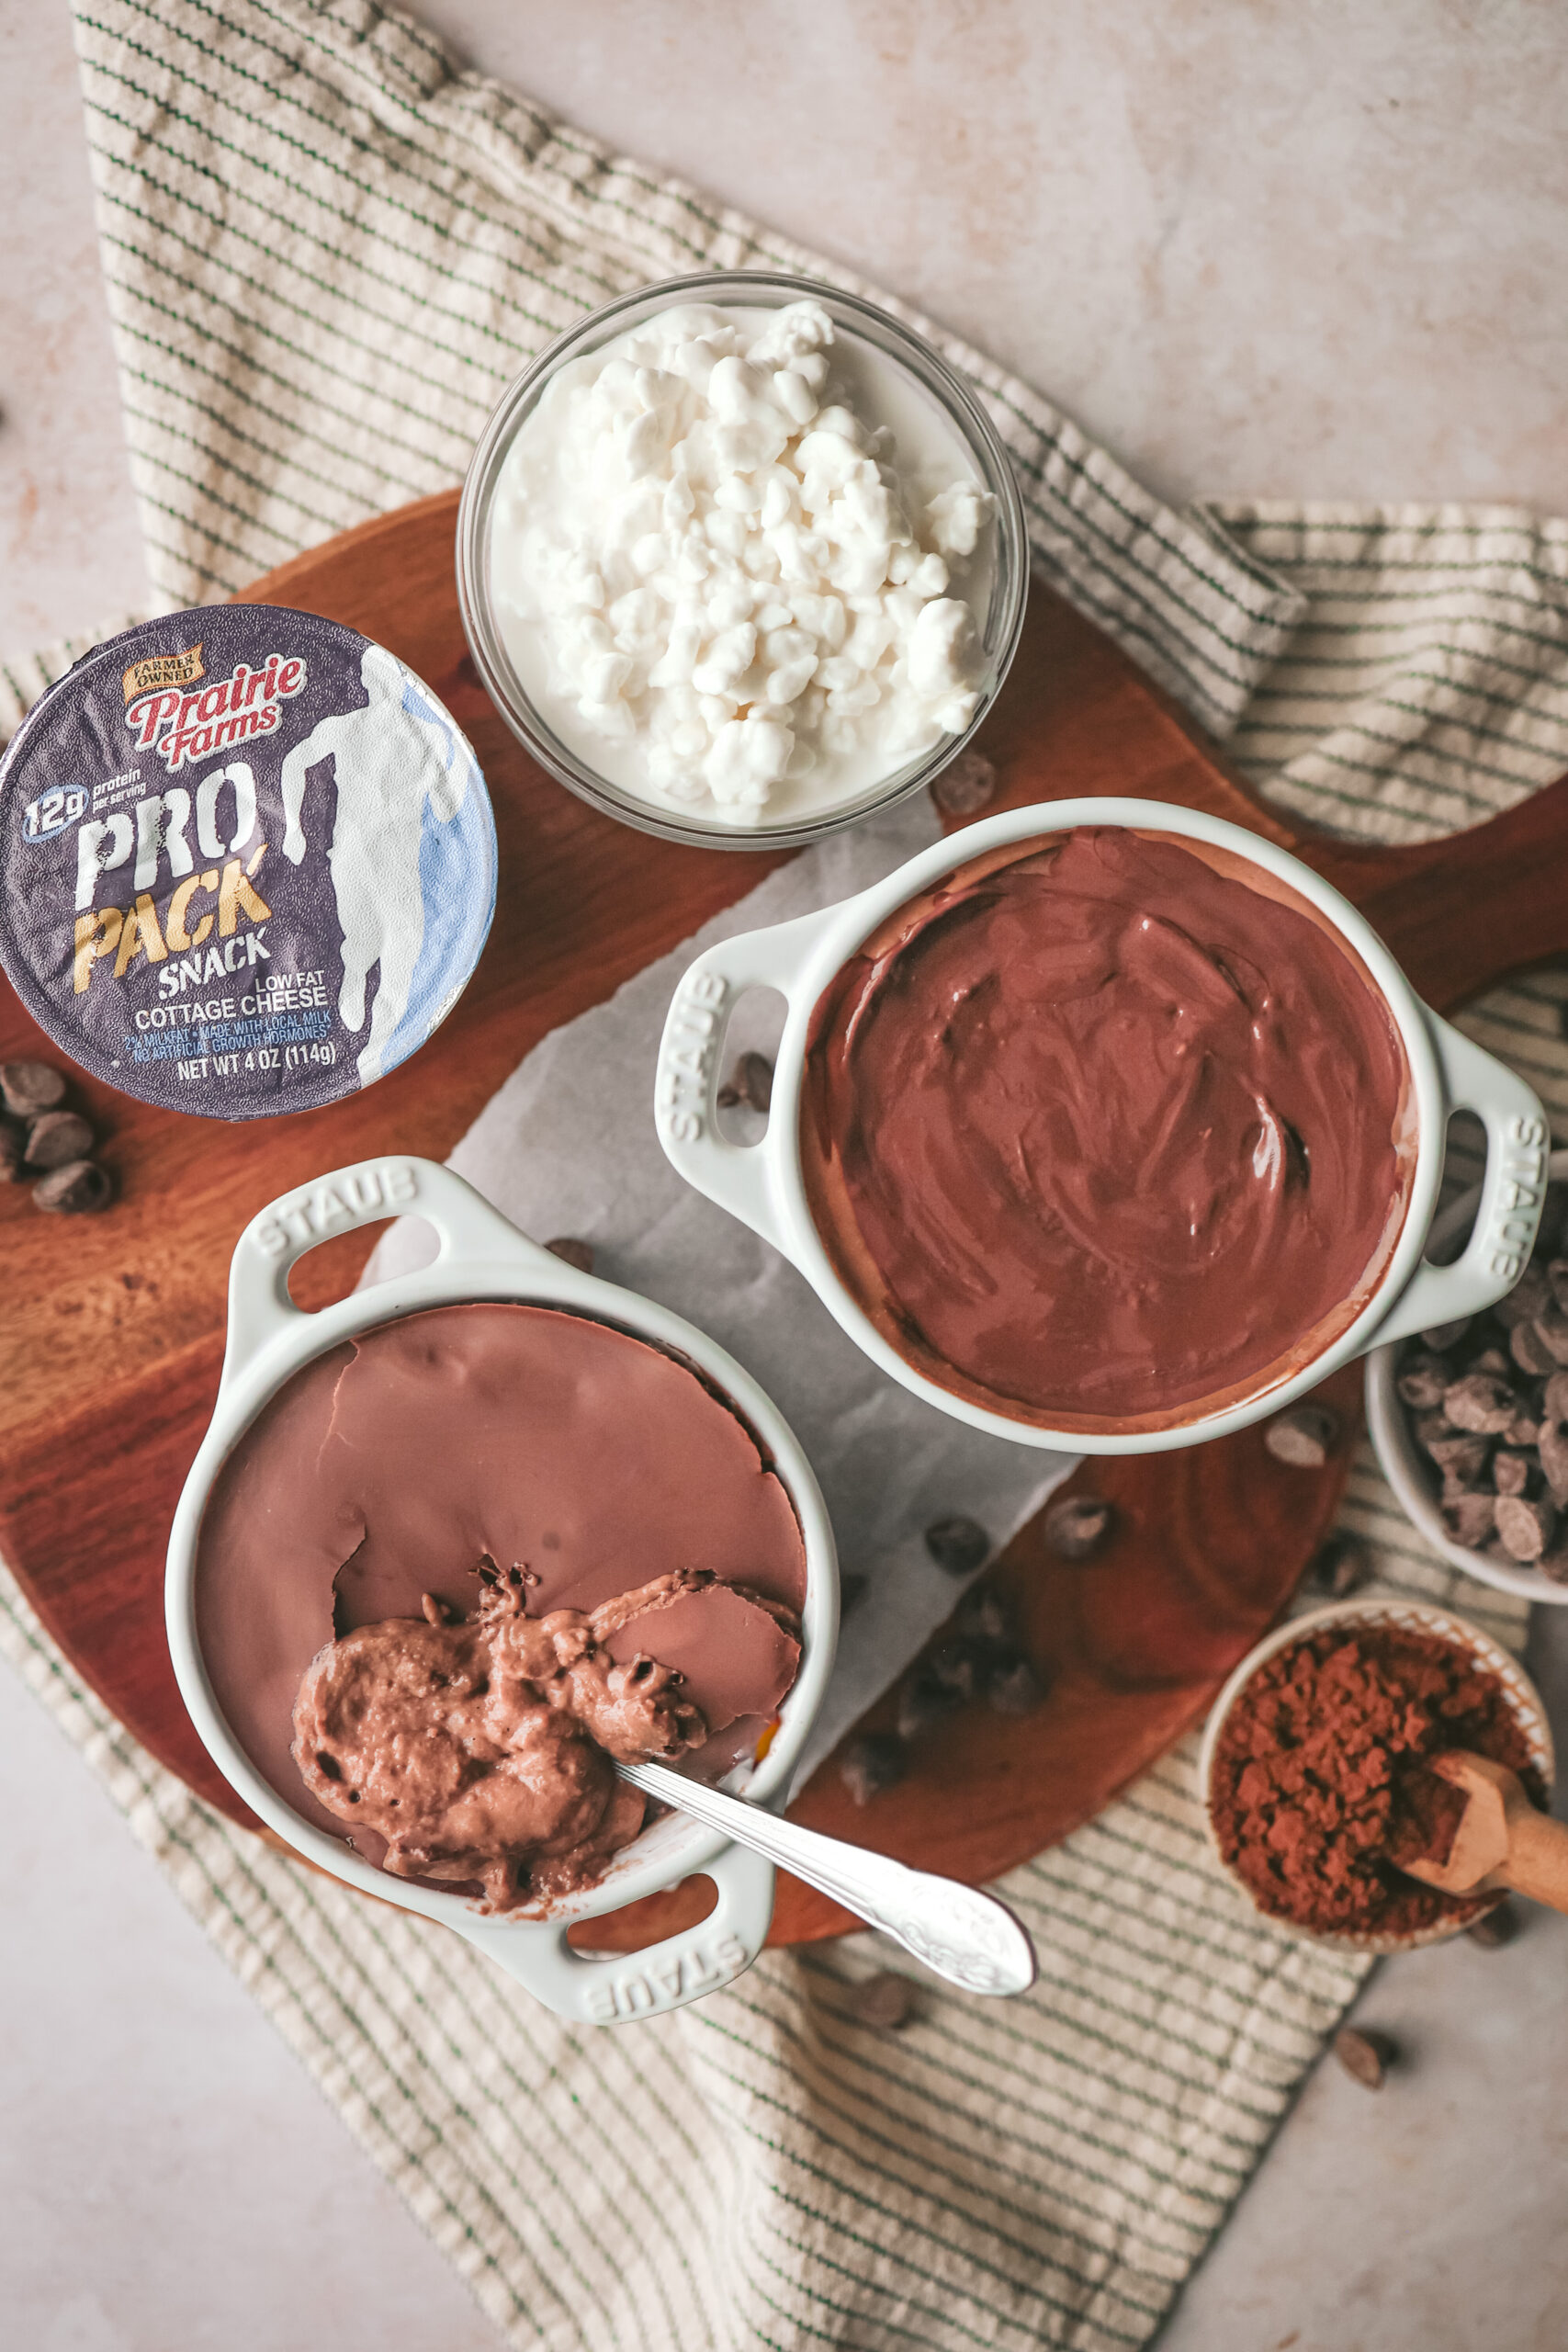
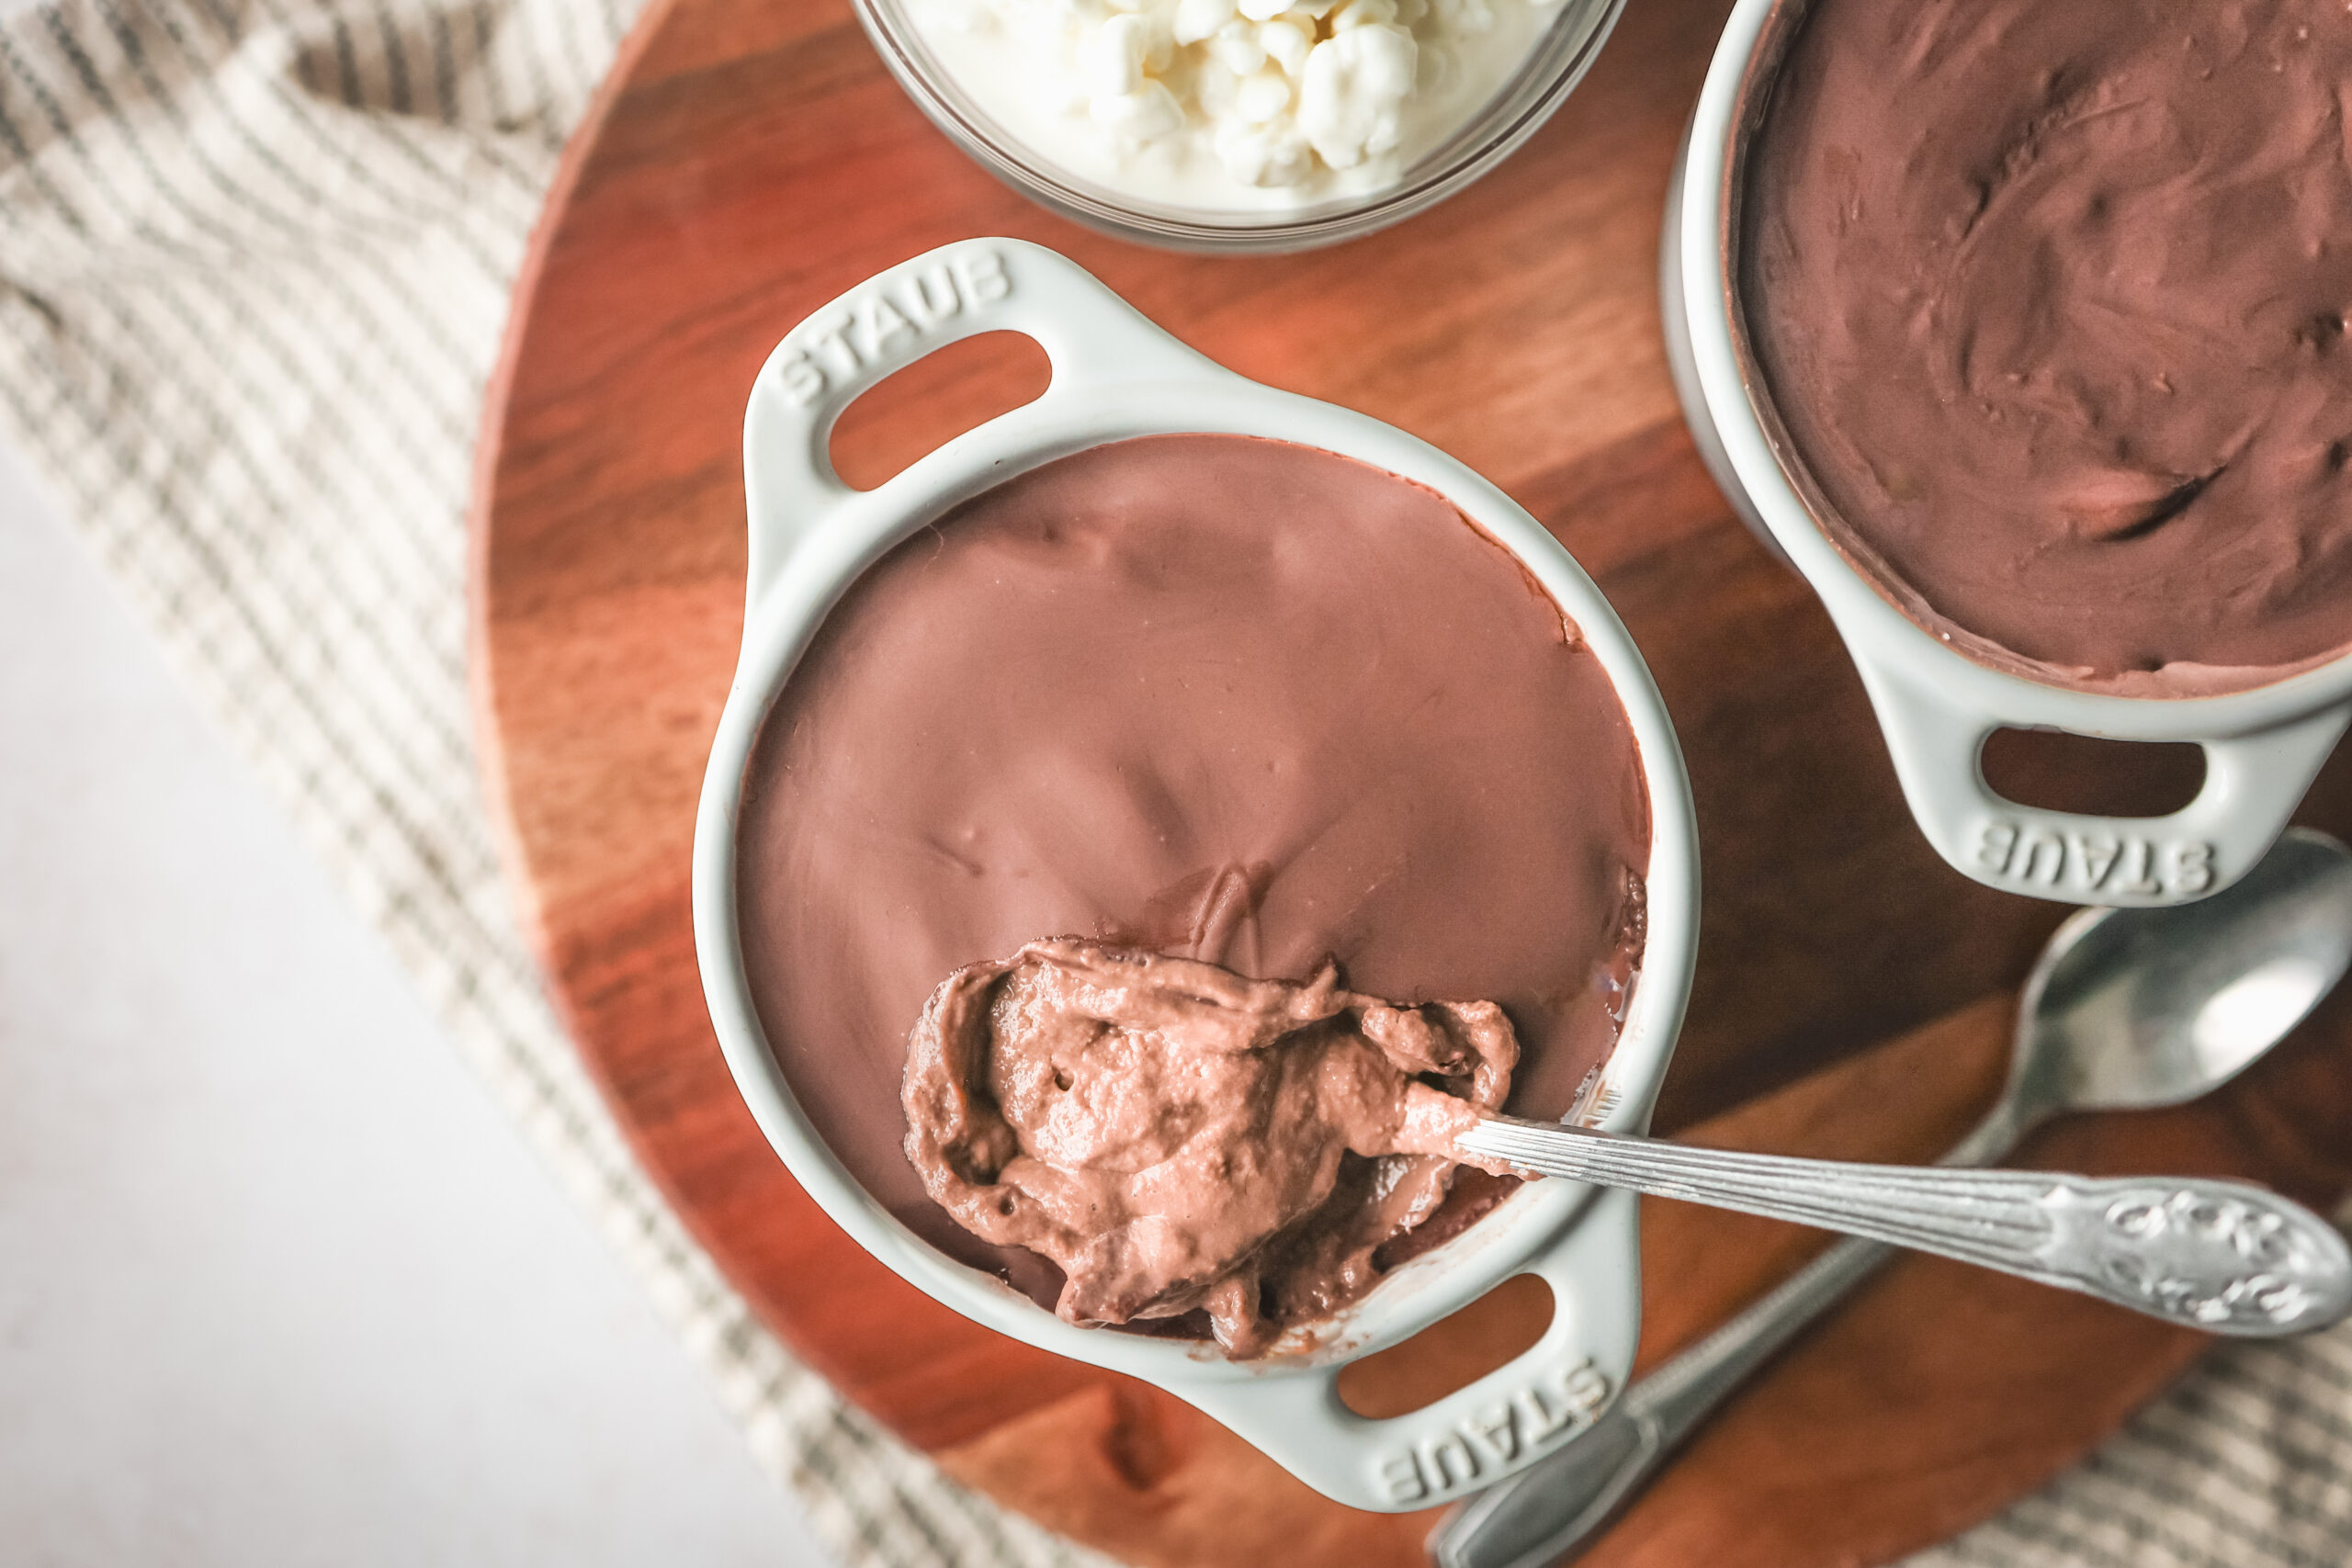
A small bowl of chocolate protein cheesecake with a cracked chocolate shell on top, revealing a creamy cocoa filling underneath.
COOK TIME
5 min
TOTAL TIME
15 min
SERVINGS
1-2 drinks
A small bowl of chocolate protein cheesecake with a cracked chocolate shell on top, revealing a creamy cocoa filling underneath.

If you’ve been following along for any amount of time, you know I’m always chasing that sweet spot between “this tastes like dessert” and “this is actually good for me.” Some nights I want something rich and chocolatey after dinner, but I don’t want the sugar crash (or the guilt) that comes with a slice of real cheesecake. That’s exactly the itch these Chocolate Protein Cheesecake Cups scratch.

Here’s the fun part: there’s no baking, no springform pan, no water bath. You just blend a handful of ingredients until they’re silky smooth, pour them into little bowls, and top them with a melted chocolate shell. Pop them in the fridge, and an hour later you’ve got a dessert that cracks open like a fancy bonbon and hides a creamy, protein-packed cheesecake filling underneath. Maybe the coolest part is breaking through that chocolate shell. 

This recipe is made in partnership with Prairie Farms, using their cottage cheese and chocolate milk- two ingredients that make this whole thing possible (more on why below).

Why This Recipe Works

The magic ingredient here is cottage cheese. I know, I know- cottage cheese in a dessert sounds like a stretch if you haven’t tried it, but once it’s blended up, it turns into something shockingly close to a whipped cheesecake filling. It’s creamy, a little tangy, and it’s packed with protein, so this “dessert” is doing a lot more nutritional heavy lifting than it lets on.

Prairie Farms cottage cheese blends up especially smooth, so you don’t end up with any curds sneaking through, just a silky base. Their chocolate milk does double duty, too: it thins the mixture out just enough and adds a little extra chocolate flavor and sweetness, so you don’t need much else to make it taste indulgent.


And then there’s the shell. Melted chocolate chips and coconut oil harden into a thin, snappy layer on top, just like the coating on a Magnum bar. Cracking through it with your spoon might be my favorite part of the whole recipe.

For the Chocolate Cheesecake Filling


  • Cottage cheese: Prairie Farms cottage cheese makes the base of the cheesecake filling creamy while adding protein.

  • Chocolate milk: Just a couple tablespoons adds extra chocolate flavor and helps everything blend smoothly. I’m using Prairie Farms chocolate milk.

  • Cocoa powder: Gives the cheesecake filling a rich chocolate flavor.

  • Maple syrup: Adds just the right amount of sweetness.

  • Vanilla extract: A little vanilla helps round out all of the chocolate flavor.

  • Salt: Don’t skip the pinch of salt! It helps bring out the chocolate flavor.

For the Chocolate Topping


  • Semi-sweet chocolate chips: I like semi-sweet chocolate chips for the topping because they melt beautifully and harden into a delicious chocolate shell.

  • Coconut oil: Just a little coconut oil helps the chocolate melt smoothly and gives you that perfect crackable topping once chilled.

How to Make Chocolate Protein Cheesecake Cups

1. Blend the cheesecake filling.

Add the cottage cheese, chocolate milk, cocoa powder, maple syrup, vanilla extract, and salt to a blender.

Blend until completely smooth and creamy. You may need to stop and scrape down the sides once or twice to make sure everything is blended.

The mixture should be thick, smooth, and creamy- just like a chocolate cheesecake filling!

2. Divide into cups.

Pour the chocolate cheesecake mixture evenly into two small bowls, cups, or individual dessert dishes.

3. Make the chocolate topping.

Add the semi-sweet chocolate chips and coconut oil to a microwave-safe bowl.

Microwave in short intervals, stirring between each one, until the chocolate is completely melted and smooth.

Be careful not to overheat the chocolate. Once most of the chocolate is melted, keep stirring and the remaining pieces should melt from the residual heat.

4. Add the chocolate shell.

Pour the melted chocolate evenly over the top of each cheesecake cup. Gently spread the chocolate if needed so it covers the entire surface.

5. Chill.

Place the cheesecake cups in the refrigerator for about 1 hour, or until the chocolate topping has completely hardened.

6. Crack and enjoy!

This is the best part!


Grab a spoon and crack through that crisp chocolate topping to get to the creamy chocolate cheesecake underneath. Enjoy right away or keep chilled until you’re ready for a sweet treat.

Tips for Making Chocolate Protein Cheesecake Cups


  • Use a good blender. You want the cottage cheese to blend completely smooth. A high-powered blender will give you the creamiest texture.

  • Blend until smooth. Don’t rush this step! Give the mixture enough time to become completely creamy and smooth with no cottage cheese texture remaining.

  • Use semi-sweet chocolate chips. This is my favorite chocolate for the topping because it creates a nice, firm shell once chilled.

  • Don’t skip the coconut oil. The coconut oil helps the chocolate melt smoothly and gives the topping that crisp, crackable texture.

  • Let the chocolate fully set. Give the cups about an hour in the refrigerator before digging in. The chocolate should be completely firm so you get that satisfying crack when you break through it.

FAQs

Can I Make These Ahead of Time?

Absolutely! These Chocolate Protein Cheesecake Cups are a great make-ahead treat. Keep them covered in the refrigerator until you’re ready to enjoy them.

How Do I Store Chocolate Protein Cheesecake Cups?

Store the cheesecake cups covered in the refrigerator for up to 3 days. Keep them chilled until you’re ready to eat them.

Can I Use a Different Chocolate for the Topping?


Yes! Semi-sweet chocolate chips are my favorite, but you can use milk chocolate or dark chocolate if you prefer. Keep in mind that different types of chocolate can set a little differently.

More Easy Chocolate Recipes

If you’re craving something chocolatey, try these easy Lolo Home Kitchen favorites:


Print
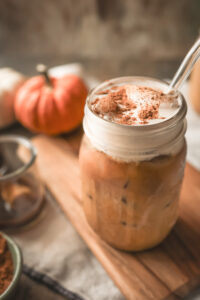
Iced Pumpkin Spice Latte topped with creamy Pumpkin Spice Cold Foam made with Prairie Farms Pumpkin Spice Milk.

Pumpkin Spice Latte with Pumpkin Cold Foam

This easy homemade Pumpkin Spice Latte is made with Prairie Farms Pumpkin Spice Milk, homemade pumpkin spice syrup, espresso, and a creamy pumpkin spice cold foam. It’s the perfect fall coffee to make at home!

Iced Pumpkin Spice Latte topped with creamy Pumpkin Spice Cold Foam made with Prairie Farms Pumpkin Spice Milk.

Prep time: 10 min  |  Cook time: 5 min  |  Total: 15 min

PRINT          RATE

Ingredients

Pumpkin Spice Syrup

1 cup brown sugar

1/2 cup pumpkin puree

1 teaspoon pumpkin pie spice

1 teaspoon vanilla extract

Big pinch of salt

3/4 cup water

Pumpkin Spice Latte

1 tablespoon pumpkin spice syrup

2 shots espresso

Ice

Prairie Farms Pumpkin Spice Milk

Pumpkin Spice Cold Foam

2 tablespoons heavy cream

1 tablespoon Prairie Farms Pumpkin Spice Milk

1–2 tablespoons pumpkin spice syrup

1/2 teaspoon pumpkin pie spice

Instructions

Make the Pumpkin Spice Syrup

  1. Add the brown sugar, pumpkin puree, pumpkin pie spice, vanilla extract, salt, and water to a saucepan.

  2. Stir to combine and bring to a simmer over medium-high heat.

  3. Simmer for 10 minutes, stirring occasionally.

  4. Remove from heat and allow to cool completely.

  5. Transfer to a clean jar or container and refrigerate.

Make the Latte

  1. Add 1 tablespoon pumpkin spice syrup to a 12-ounce glass.

  2. Brew 2 shots of espresso directly over the syrup. Stir to combine.

  3. Fill the glass with ice.

  4. Pour Prairie Farms Pumpkin Spice Milk over the espresso and ice.

Make the Pumpkin Spice Cold Foam

  1. Add heavy cream, Pumpkin Spice Milk, pumpkin spice syrup, and pumpkin pie spice to a cup.

  2. Use a milk frother to whip until thick and foamy.

  3. Pour the cold foam over the latte.

  4. Sprinkle it with a little extra pumpkin pie spice, if desired.


Notes


  • The homemade pumpkin spice syrup makes enough for several lattes.

  • You can substitute your favorite store-bought pumpkin spice syrup.

  • The cold foam makes enough for approximately 1-2 lattes, depending on size and preference.

  • Store homemade pumpkin spice syrup in an airtight container in the refrigerator and use within about a week.
Notes

DID YOU MAKE THIS RECIPE?

Tag @LOLOHomeKitchen on Instagram and hashtag it #lolohk

CHECK IT OUT

Leave A Comment

Recipe rating 5 Stars 4 Stars 3 Stars 2 Stars 1 Star

    • Sign me up. Sign me up. Sign me up. Sign me up. Sign me up. Sign me up.
    • Sign me up. Sign me up. Sign me up. Sign me up. Sign me up. Sign me up.
    • Sign me up. Sign me up. Sign me up. Sign me up. Sign me up. Sign me up.

    Leave A Comment

    Recipe rating 5 Stars 4 Stars 3 Stars 2 Stars 1 Star