WHAT’S FOR DINNER?
Ham and Cheese Roll Ups

COOK TIME
TOTAL TIME
SERVINGS


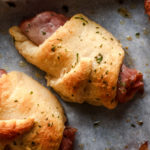
These simple Ham and Cheese Roll Ups are perfect for when you need a quick and easy snack, lunch, appetizer, or dinner! Just roll up some ham and cheddar in a premade crescent dough and brush them with a savory garlic butter and pop them in the oven. Ready in just 20 minutes, it’s the perfect way to enjoy a hot meal with little prep work!
I’m no stranger to the magic of premade crescent dough. It’s one of the easiest ways to make quick and easy foods without spending time making dough. We use it to make Crescent Roll Taco Pizza, Breakfast Roll Ups, Apple Dumplings, and Cheesy Pigs in a Blanket!
But one of my all-time favorite things to do with this buttery dough is to make roll ups stuffed with ham and cheese. They’re handheld, melty, packed flavor, and they come together in under 20 minutes including bake time! We make them on a busy weeknight, for lunch, or as an after-school snack for Leah.
All you need is a tube of crescent dough, slices of cheddar and ham, and a quick brush of garlic butter to bring them to life. Pop them in the oven for 10 minutes until they are golden brown and warm inside. Add a side of soup, salad, or even just some fruit or chips, and you’ve got a meal that’s easy and kid approved!
Why You’ll Love This Recipe
Small ingredient list: It uses just a handful of simple ingredients that you probably already have on hand, making it perfect for last-minute meals.
Customizable: You can swap in your favorite cheeses, deli meats, or seasonings to make it your own every time.
Versatile: These roll ups work great as an easy lunch, quick dinner, snack, or even as a party appetizer.
Ready in 20 minutes: 10 minutes (or less) to assemble and 10 minutes to bake making this meal super quick to whip up.
Ingredients You’ll Need
Crescent Roll Dough – This can be found at any grocery store in the refrigerated section. The dough is light and buttery and when baked adds a nice crispy top. Pillsbury is the most popular but you can use whichever brand you like.
Cheddar Cheese Slices – Adds that sharp melty bite that gets warm and gooey in the oven and brings everything together.
Deli Ham Slices – Adds the meaty protein along with a salty smoky flavor. Feel free to choose your favorite brand, thickness, or flavor to make it your own.
Homemade Garlic Butter – Melted butter mixed with dried parsley and garlic gets brushed on the dough before baking for a crispy, rich garlicky flavor.
How To Make Baked Crescent Roll Ham and Cheese Roll Ups
Prepare for baking: Preheat the oven to 375°F and line a baking sheet with parchment paper or spray with nonstick cooking spray. This helps prevent the crescent rolls from sticking.
Roll out the dough: Open the tube of crescent roll dough and separate it into individual triangles. Lay them out flat on a clean surface or cutting board with the wider ends facing you.
Add the filling: Place a slice of cheddar cheese on the wide end of each crescent triangle. Layer one to two slices of deli ham over the cheese. You can fold or tear the ham to fit within the dough.
Roll them up: Starting at the wide end, gently roll each crescent triangle toward the narrow point, wrapping the ham and cheese inside. Place each roll seam-side down on your prepared baking sheet.
Make the garlic butter: In a small bowl, stir together the melted butter, garlic powder, and dried parsley until combined.
Brush and bake: Use a pastry brush to coat the tops of the crescent rolls with the garlic butter mixture. Bake in the preheated oven for 8–10 minutes, or until the crescent rolls are golden brown and the cheese is melted and bubbly.
Cool and serve: Remove the ham and cheese roll ups from the oven and let them cool for about 5 minutes. Serve warm and enjoy!
Expert Tips
When unrolling the crescent dough triangles, do it carefully to make sure they don’t tear. For best results, let the tube of dough sit at room temperature for 10-15 minutes so it softens enough to handle better.
If you are using large ham slices, you can cut or tear them to make the shape you need so they fit in the rolls well without overflowing.
When rolling everything together, make sure you wrap it up snug but not too tight as you don’t want the filling to spill out during baking.
Placing the roll ups seam side down helps keep them from unraveling in the oven.
Every oven is different, so check on the roll ups at the 8 minute mark so you they don’t burn.
Once they are out of the oven, let them cool for about 5 minutes. This will help the cheese set and thicken which will help hold everything in place.
Ways To Customize
One of my favorite things about this recipe is how customizable it is. If you don’t like ham, you can swap it out for any meat you enjoy. You can also change out the cheeses and add other spices and different foods to flavor them!
Meats: Instead of ham, use thinly sliced turkey, pepperoni, chicken breast, roast beef, or prosciutto to vary the main protein.
Cheeses: Switch up the cheese with Swiss, Pepperjack, provolone, mozzarella, gouda or even soft cheeses like cream cheese, or ricotta.
Spices and Seasonings: Enhance the garlic butter with onion powder, dried thyme, smoked paprika, everything bagel seasoning, dried oregano, or dried basil.
Veggies: Add in finely diced bell peppers, thinly sliced green onions, carmelized onions, a few spinach leaves, or sautéed mushrooms inside the roll-ups for added texture and nutrients.
Dipping Sauces: Serve these roll-ups with dipping options like creamy ranch, mustard, buffalo sauce, cheese dip, or marinara for an extra layer of flavor.
Other Add-ins: Add thin slices of dill pickle, pickled jalapeños, or chopped sun-dried tomatoes inside the roll-ups before baking.
Serving Suggestions
Pair ham and cheese roll ups with these delicious sides!
Storage Instructions
Storing: Leftover ham and cheese roll-ups are best enjoyed fresh, but you can store them in an airtight container in the refrigerator for up to 3-4 days. Just make sure they’re completely cool before you put them away so they don’t become too soggy. Freezing is not recommended as the texture of the crescent roll will change too much when thawed.
Reheating: Reheat the roll-ups in a preheated oven or air fryer at 350°F for about 8-10 minutes, or until warmed through and the cheese is melty.
FAQ
Can I assemble these ham and cheese roll-ups ahead of time?
They can be assembled up to 4 hours in advance. Assemble the roll-ups, place them on the baking sheet, cover loosely with plastic wrap, and refrigerate. If baking from cold, you might need to add a minute or two to the usual bake time.
What’s the best way to keep the cheese from leaking out while baking?
To prevent the cheese from leaking, make sure your cheese slices are centered and fully enclosed by the ham and then by the dough as you roll. Rolling them snugly helps to seal in the filling, and avoid overfilling each crescent.
My crescent dough isn’t separating easily. What should I do?
If the dough seems sticky, gently pull the triangles apart at the perforations, or use a knife or pizza cutter to separate them. Sometimes, letting the dough sit out at room temperature for just 10-15 minutes can make it more pliable and easier to handle.
Can I use shredded cheese instead of slices for this recipe?
Yes, shredded cheese works well! Place a small mound of shredded cheese on the wide end of the dough triangle. Just make sure you do not overfill, as shredded cheese can sometimes melt and spread more easily than slices.
Do I have to use the garlic butter, or can I skip it?
The garlic butter adds a fantastic savory flavor and a crispy finish, but it is entirely optional. You can bake the roll-ups plain, or brush them with just plain melted butter for a golden look without the garlic.
Can I make these ham and cheese roll-ups in an air fryer?
Arrange the roll-ups in a single layer in your air fryer basket, making sure they are not overcrowded. Air fry them at 325-350°F for about 5-8 minutes, checking frequently until they are golden brown and cooked through. Make sure you use parchment paper or a silicone liner to keep them from sticking to the air fryer basket.
More Quick Meal Ideas

Ham and Cheese Roll Ups
Ham slices and melty cheese all wrapped in a buttery crescent roll. An easy recipe that takes less than 30 minutes to make. A perfect recipe for kids and busy weeknights!

Ingredients
1 tube Crescent roll dough (8 oz)
Deli ham slices
Cheddar cheese slices
3 Tablespoons butter, melted
1/2 teaspoon garlic powder
1 teaspoon dried parsley
Instructions
1. Preheat oven to 375 degrees.
2. Roll out crescent roll dough and divide the triangles. Lay a section of cheddar cheese on the wide side of the crescent roll. Layer a slice or two of ham over the cheese.
3. Starting at the wide end, roll up the crescent roll with the cheese and ham. Place each roll
on a cookie sheet lined with parchment or nonstick spray.
4. In a small bowl, mix the melted butter, garlic powder and parsley. Brush the butter mix over top the rolls.
5. Bake for 8-10 minutes or until the dough starts to turn golden brown and cheese is melty.
6. Remove from oven and cool for about 5 minutes then serve!
Notes
- Sign me up. Sign me up. Sign me up. Sign me up. Sign me up. Sign me up.
- Sign me up. Sign me up. Sign me up. Sign me up. Sign me up. Sign me up.
- Sign me up. Sign me up. Sign me up. Sign me up. Sign me up. Sign me up.
NEED IDEAS FOR FOODS YOUR KIDS
WILL *ACTUALLY* EAT?
Our best tips for quick and tasty recipes, ideas and more, right to your inbox.


5 Responses
Really enjoyed these! The butter and spices took it up a notch, while still super simple and yummy. Thank you for sharing your recipes with the world – I have saved quite a few to try! Katie Bokowski passed along your blog, and I’m so glad she did! 😊
Katie is the BEST! So happy you liked these and found more to try! Thank you!
Thank you for including me!